In This Article
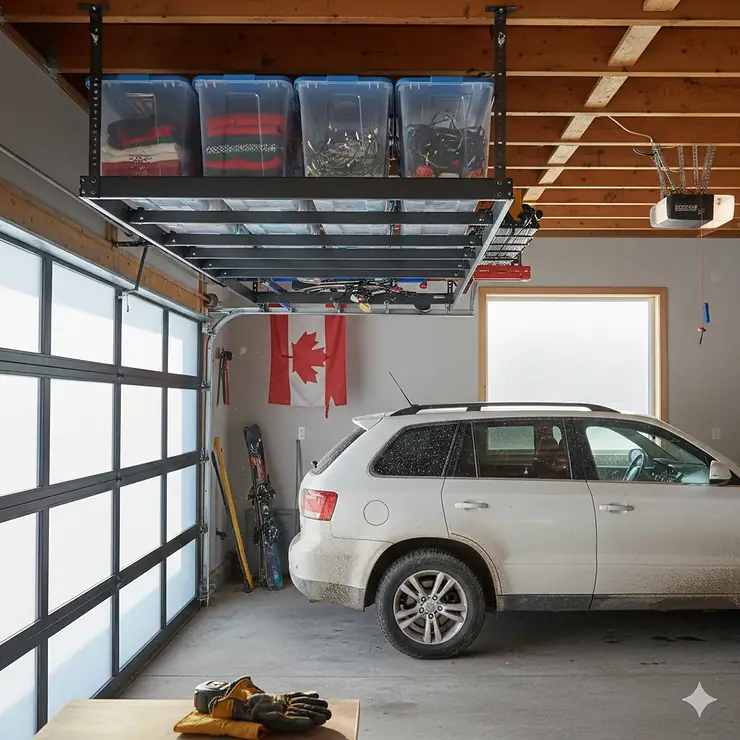
Picture this: you’re trying to squeeze your car into the garage during a February snowstorm, but there’s barely enough room to open the door because bins, sporting equipment, and seasonal items have taken over your floor space. Sound familiar?

Most Canadian homeowners face this challenge, especially when storing winter tires, camping gear for summer adventures, holiday decorations, and all the equipment that comes with our four distinct seasons. The solution? Overhead garage storage racks that transform your wasted ceiling space into organized, accessible storage.
These ceiling-mounted systems are particularly valuable in Canada, where garages often serve as transitional zones between harsh outdoor conditions and cozy home interiors. According to the Canadian Centre for Occupational Health and Safety, proper garage organization isn’t just about aesthetics—it’s a safety issue that reduces tripping hazards and creates safer work environments.
I’ve spent weeks researching and comparing overhead garage storage racks specifically for the Canadian market, examining products available on Amazon.ca with pricing in Canadian dollars. This guide covers everything from budget-friendly options under $150 CAD to premium systems that support 750 lbs, helping you maximize your garage’s vertical potential while keeping your belongings safe and accessible year-round.
Whether you’re in a Vancouver condo with limited parking, a Toronto townhome, or a Calgary house with a spacious double garage, there’s an overhead storage solution that fits your needs and budget.
Quick Comparison Table
| Brand & Model | Size | Capacity | Price (CAD) | Best For | Rating |
|---|---|---|---|---|---|
| FLEXIMOUNTS GR48 Classic | 4×8 ft | 750 lbs | $209-$299 | Heavy-duty needs | ⭐⭐⭐⭐⭐ |
| SafeRacks 4×8 Premium | 4×8 ft | 600 lbs | $280-$350 | Professional quality | ⭐⭐⭐⭐⭐ |
| MonsterRax 4×8 | 4×8 ft | 500 lbs | $225-$280 | Veteran-owned brand | ⭐⭐⭐⭐½ |
| FLEXIMOUNTS 3×6 Compact | 3×6 ft | 450 lbs | $169-$219 | Smaller garages | ⭐⭐⭐⭐½ |
| SafeRacks 3×6 Standard | 3×6 ft | 400 lbs | $185-$240 | Mid-range option | ⭐⭐⭐⭐ |
| MonsterRax 2×8 Slim | 2×8 ft | 350 lbs | $170-$210 | Narrow spaces | ⭐⭐⭐⭐ |
| Hyloft Adjustable Budget | 34×26 in | 250 lbs | $129-$165 | Budget-conscious | ⭐⭐⭐½ |
💬 Just one click – help others make better buying decisions too! 😊
✨ Don’t Miss These Exclusive Deals!
🔍 Take your garage organization to the next level with these carefully selected products available in Canada. Click on any highlighted item to check current pricing and availability on Amazon.ca. These tools will help you create authentic storage solutions your family will love!
Top 7 Overhead Garage Storage Racks – Expert Analysis
1. FLEXIMOUNTS GR48 Classic 4×8 – The Heavy-Duty Champion
If you’re serious about maximizing ceiling space, the FLEXIMOUNTS GR48 Classic stands as the heavyweight champion of overhead garage storage racks in Canada. This powerhouse system dominates the Amazon.ca bestseller list for good reason.
Key Specifications:
- Dimensions: 96″ L × 48″ W × 22-40″ H (adjustable drop height)
- Weight capacity: 600-750 lbs (depending on model variant)
- Material: 14-gauge cold-rolled steel construction
- Available in black or white powder-coated finish
Canadian buyers on RedFlagDeals forums consistently praise this rack, with recent deals seeing it drop to $168.83 CAD during Prime Day sales. At regular pricing around $209-$299 CAD, it provides exceptional value compared to professional installation systems that can cost $800+.
What sets the FLEXIMOUNTS apart is its reinforced ceiling brackets that span across two ceiling joists, distributing weight more evenly than competitors. This design is particularly important in Canadian homes built after 2015, where ceiling joist spacing and structural considerations require careful attention. The integrated grid deck design eliminates the need for separate wire decking, simplifying installation and reducing costs.
Canadian customers report storing everything from winter tires (which we all need storage for!) to camping equipment and seasonal decorations. One Toronto homeowner shared that they consolidated their storage unit contents onto two of these racks, saving over $300 annually in rental fees.
✅ Pros:
- Industry-leading 750 lb capacity on pro models
- Long ceiling brackets attach to 2 joists for superior stability
- Height adjustable (22-40 inches) to accommodate garage door clearance
❌ Cons:
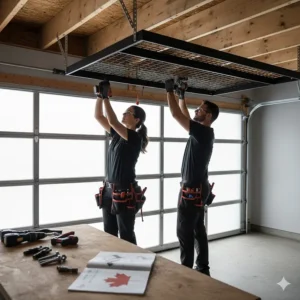
- Installation requires 2 people and approximately 4 hours
- Some Canadian buyers report concerns about ceiling structural capacity in newer homes
Price Range: $168-$299 CAD on Amazon.ca (watch for seasonal deals)
2. SafeRacks 4×8 Premium Overhead System – The Professional’s Choice
When contractors and professional organizers in Canada need overhead storage, they consistently recommend SafeRacks. This American brand has built a reputation for industrial-strength construction that exceeds residential requirements.
Key Specifications:
- Dimensions: 4 ft × 8 ft with multiple dropdown options (12-21″, 18-33″, or 24-45″)
- Weight capacity: 600 lbs evenly distributed
- Material: 14-gauge industrial steel C-channel beams
- Powder-coated finish (hammertone or white)
The SafeRacks system distinguishes itself through Grade 8 case-hardened lag bolts—the same hardware grade used in commercial applications. Available on Amazon.ca starting around $280 CAD, this rack costs more than budget alternatives but delivers superior longevity and safety margins.
What Canadian buyers appreciate most is the certified installer network available in 40+ major cities including Toronto, Vancouver, Calgary, and Montreal. Professional installation runs approximately $150-$250 CAD additional, but many homeowners find this worthwhile given the weight and safety considerations. The Canadian Centre for Occupational Health and Safety emphasizes that proper installation to ceiling joists is critical for safety.
One unique feature is SafeRacks’ patented ceiling bracket design that evenly distributes weight across a larger portion of your ceiling structure—crucial for Canadian building codes and peace of mind.
✅ Pros:
- Made-in-USA quality with lifetime warranty
- Professional installation available across Canada
- Superior hardware and finishing compared to competitors
❌ Cons:
- Higher price point ($280-$350 CAD)
- Installation service availability varies by region
Price Range: $280-$350 CAD on Amazon.ca
3. MonsterRax 4×8 Veteran-Owned Excellence – The Value Leader
American veteran-owned MonsterRax delivers impressive quality at mid-range pricing, making it a favourite among DIY enthusiasts across Canada who want professional results without professional prices.
Key Specifications:
- Dimensions: 4 ft × 8 ft (adjustable 24-45″ drop or 12-21″ drop)
- Weight capacity: 500 lbs
- Material: Industrial-strength powder-coated steel
- Available in white or hammertone grey
At $225-$280 CAD on Amazon.ca, MonsterRax hits the sweet spot between budget racks and premium systems. The company started when a veteran got tired of crawling into tight attic spaces during holidays—a problem every Canadian with seasonal decorations understands intimately.
The 120 cubic feet of storage capacity (with full 45-inch dropdown) can accommodate full-sized storage bins, camping gear, winter sports equipment, and even kayaks if properly secured. Canadian buyers particularly appreciate the rust-resistant powder coating, essential for garages in humid coastal regions like Vancouver or Halifax where salt air accelerates corrosion.
One Manitoba homeowner reported successfully storing an entire season’s worth of winter gear—parkas, snow pants, boots, sleds—freeing up closet space throughout their home. The installation template system makes DIY installation more manageable, though you’ll still want a helper and 3-4 hours set aside.
✅ Pros:
- Excellent value proposition at mid-range pricing
- Lifetime warranty backed by responsive customer service
- Compatible with extensive accessory ecosystem (hooks, LED lights)
❌ Cons:
- 500 lb capacity lower than premium competitors
- Installation instructions could be more detailed
Price Range: $225-$280 CAD on Amazon.ca
4. FLEXIMOUNTS 3×6 Compact Series – The Small-Space Solution
Not every Canadian garage has room for a massive 4×8 ft rack, especially in urban areas where condo and townhome garages run smaller. The FLEXIMOUNTS 3×6 provides serious storage capacity in a more compact footprint.
Key Specifications:
- Dimensions: 72″ L × 36″ W × 22-40″ H adjustable
- Weight capacity: 450 lbs
- Material: Heavy-duty cold-rolled steel
- Integrated wire deck design
Priced between $169-$219 CAD on Amazon.ca, this FLEXIMOUNTS model delivers 67 cubic feet of storage—enough for seasonal items, holiday decorations, sporting equipment, and more. The smaller size actually offers advantages beyond fitting tight spaces: it’s easier to install alone if necessary, puts less strain on older ceiling structures, and can be positioned to avoid garage door tracks and lighting fixtures.
Toronto condo owners particularly favour this size, as many underground parking spaces have lower ceiling heights that make full-sized racks impractical. The adjustable height (22-40 inches from ceiling) lets you customize clearance based on your garage door arc and ceiling obstructions.
One Vancouver homeowner cleverly installed two 3×6 racks perpendicular to each other, creating an L-shaped storage system that maximized their odd-shaped garage layout while maintaining full car clearance underneath.
✅ Pros:
- Ideal for smaller Canadian garages and condos
- Lower price point without sacrificing quality
- Easier single-person installation possible
❌ Cons:
- Reduced storage volume compared to 4×8 ft models
- May require multiple units for larger households
Price Range: $169-$219 CAD on Amazon.ca
5. SafeRacks 3×6 Standard Rack – The Balanced Performer
SafeRacks’ smaller 3×6 Standard model brings the same industrial quality as their flagship in a garage-friendly size. At $185-$240 CAD on Amazon.ca, it bridges the gap between budget and premium pricing.
Key Specifications:
- Dimensions: 3 ft × 6 ft with 18-33″ ceiling dropdown
- Weight capacity: 400 lbs
- Material: 14-gauge industrial steel C-channel construction
- Powder-coated white or hammertone finish
The SafeRacks 3×6 excels in versatility. Canadian buyers use it for everything from storing complete sets of seasonal tires (winter and summer sets combined) to organizing camping equipment for family vacations in the Rockies or camping trips to Ontario’s provincial parks.
The 67 cubic feet of storage might not sound massive, but it’s remarkable how much you can fit when items are properly organized in bins and containers. One Calgary family reported fitting their entire Christmas decoration collection, Halloween supplies, and camping gear on a single rack—previously this required a corner of their garage plus basement space.
The quality of SafeRacks’ powder coating deserves special mention. In Canadian climates where garages experience extreme temperature swings (from -30°C winters to +35°C summers), cheap paint finishes crack and peel. SafeRacks’ coating withstands these cycles year after year.
✅ Pros:
- Proven SafeRacks quality in compact format
- Professional installation available in major Canadian cities
- Excellent weight distribution and safety features
❌ Cons:
- Price premium over comparable competitors
- Limited to 400 lb capacity vs larger models
Price Range: $185-$240 CAD on Amazon.ca
6. MonsterRax 2×8 Slim Profile – The Narrow Space Specialist
Some Canadian garages have plenty of length but limited width, especially older single-car garages common in urban neighbourhoods. The MonsterRax 2×8 addresses this specific challenge brilliantly.
Key Specifications:
- Dimensions: 2 ft × 8 ft (24-45″ adjustable dropdown)
- Weight capacity: 350 lbs
- Material: Heavy-duty powder-coated steel
- Available in white or hammertone
At $170-$210 CAD on Amazon.ca, this MonsterRax variant offers strategic storage along garage walls or above garage doors without eating into precious width. The 40 cubic feet of storage accommodates long items perfectly—fishing rods, lumber, seasonal sporting equipment like skis and snowboards, even kayaks and canoes with proper support.
One innovative use from an Ottawa homeowner: installing two 2×8 racks parallel to each other along opposite walls, creating “lanes” of overhead storage while maintaining clear floor space down the centre for vehicle parking. This configuration works exceptionally well in older garages with 8-foot ceilings where traditional storage solutions feel cramped.
The slim profile also makes this rack ideal for above garage door installations, utilizing that often-wasted space. Just ensure you verify garage door clearance requirements and avoid interference with the door mechanism or opener.
✅ Pros:
- Perfect for narrow garages and tight spaces
- Excellent for long, bulky items (skis, fishing rods, lumber)
- Can be installed above garage doors in many layouts
❌ Cons:
- Lower 350 lb capacity requires careful load management
- Narrower width limits storage bin options
Price Range: $170-$210 CAD on Amazon.ca
7. Hyloft Adjustable Budget Rack – The Entry-Level Option
If you’re testing the waters of overhead storage or working with a tight budget, the Hyloft Adjustable Rack provides a capable entry point at a fraction of premium system costs.
Key Specifications:
- Dimensions: 34″ × 26″ adjustable height
- Weight capacity: 250 lbs evenly distributed
- Material: Powder-coated steel
- Hammertone finish
Priced at just $129-$165 CAD on Amazon.ca, this Hyloft system won’t replace your entire garage storage needs, but it’s perfect for specific applications. Think of it as specialized rather than comprehensive—ideal for seasonal decorations, out-of-season sports equipment, or camping gear that only comes out a few times per year.
Canadian buyers on tight budgets often start with one or two Hyloft racks to address immediate storage pain points, then upgrade to larger systems as budget allows. The smaller size also makes it perfect for renters who may move and want portable storage solutions they can take to their next home.
One creative use from a Montreal apartment dweller: installing a Hyloft rack in their indoor storage locker to keep winter clothing and equipment off the floor and protected from moisture. While it’s designed for garages, the concept works anywhere you have ceiling access and need to maximize vertical space.
The trade-off for the lower price is reduced capacity and coverage area. You’ll need realistic expectations about what 250 lbs supports—think lightweight storage bins, not power tools and hardware.
✅ Pros:
- Entry-level pricing accessible to most budgets
- Smaller footprint ideal for apartments and condos
- Easy installation for DIY beginners
❌ Cons:
- Limited 250 lb capacity
- Smaller size requires multiple units for complete coverage
Price Range: $129-$165 CAD on Amazon.ca
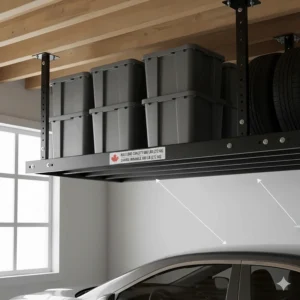
Understanding Ceiling Storage Rack 4×8 Dimensions
The ceiling storage rack 4×8 size has become the industry standard for good reason—it perfectly matches common ceiling joist spacing and provides optimal storage capacity without overwhelming typical Canadian garage spaces.
Why 4×8 Feet Works So Well
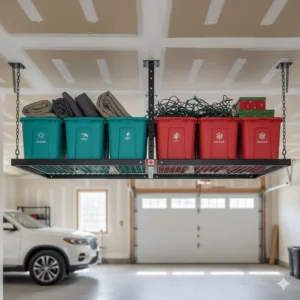
A 4×8 ft overhead rack provides 32 square feet of surface area, translating to approximately 80-120 cubic feet of usable storage depending on your ceiling dropout height. To put this in perspective, that’s enough space to store:
- 15-20 medium storage bins (66L size)
- A complete set of four winter tires plus seasonal equipment
- Holiday decorations for the entire year
- Camping gear for a family of four including tent, sleeping bags, and coolers
- Sporting equipment for multiple activities
The 96-inch length aligns with standard 8-foot ceiling spans found in most Canadian residential construction. This isn’t coincidental—ceiling joists typically run either 16 inches or 24 inches on centre, and an 8-foot rack spans multiple joists regardless of spacing, providing secure mounting points.
Installation Considerations for Canadian Homes
Canadian building codes vary by province, but most residential garages built after 2000 feature either 2×8 or 2×10 ceiling joists. Before installing any ceiling storage rack 4×8 system, verify your joist size and spacing. A stud finder with deep-scan capability works for finished ceilings, while unfinished garages let you directly measure joist dimensions.
According to research from the University of Manitoba’s Faculty of Engineering, typical ceiling joists in Canadian construction can support distributed loads well beyond the 600-750 lb capacity of premium overhead racks—but only when properly installed with lag bolts into solid wood. The key word is “distributed”—concentrating weight at a single point creates stress that even robust framing can’t handle safely.
One crucial consideration: homes built in the last decade, particularly in rapidly growing cities like Calgary and Surrey, sometimes feature engineered lumber or truss systems instead of traditional dimensional lumber joists. These require special attention during installation, as mounting points must hit the truss chords, not just the webbing.
Ceiling Height and Clearance Planning
Most Canadian garages feature ceiling heights between 8 and 10 feet, with newer construction trending toward 9-foot minimums in attached garages. Your ceiling storage rack 4×8 setup needs to account for several clearances:
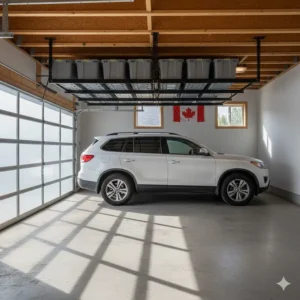
Garage Door Clearance: When your sectional garage door opens, it typically rises 18-24 inches from the ceiling at its highest arc. Measure your specific door’s travel path before installing overhead racks to avoid collisions.
Vehicle Clearance: SUVs and pickup trucks—extremely popular in Canada—can reach 75-78 inches in height. Adding roof racks or cargo carriers pushes this even higher. Plan your rack dropdown accordingly.
Working Clearance: You’ll need to reach your storage, so factor in step ladder height plus comfortable reach distance. Most people find 6-8 feet from the floor to the bottom of storage bins ideal.
The adjustable nature of quality racks (typically 12-45 inches of dropdown adjustment) lets you customize for your specific situation, but measuring twice and installing once prevents frustrating do-overs.
Overhead Storage Rack 600 lbs: Understanding Weight Capacity
Weight capacity ratings cause more confusion than perhaps any other aspect of overhead garage storage racks. When manufacturers advertise “600 lbs capacity,” what does that actually mean for Canadian homeowners, and how should you interpret these numbers?
Decoding Load Ratings
An overhead storage rack 600 lbs rating refers to the maximum evenly distributed load the rack structure itself can handle under ideal installation conditions. Three critical words in that definition require explanation:
Evenly distributed means weight spread uniformly across the entire rack surface. Stacking all 600 lbs in one corner creates dangerous stress concentration that can bend or break even heavy-duty steel. Think of loading like arranging books on a shelf—spacing items out rather than clustering them preserves structural integrity.
Ideal installation assumes proper mounting to ceiling joists with appropriate lag bolts (typically 3/8″ × 3″ minimum), square and level rack alignment, and solid wood framing members. Any deviation—like missing a joist and hitting only drywall, using undersized hardware, or mounting to compromised framing—dramatically reduces safe capacity.
The rack structure is just one component of the system. Your ceiling joists, mounting hardware, and even the storage containers themselves all factor into total system capacity. A 600 lb rated rack mounted to undersized joists or a compromised ceiling doesn’t actually support 600 lbs safely.
Real-World Canadian Usage
Let’s translate 600 lbs into practical Canadian garage scenarios:
Winter Tire Storage: Four mounted winter tires for a midsize SUV (like a Honda CR-V or Toyota RAV4) weigh approximately 140-160 lbs total. Add four summer tires and you’re at 280-320 lbs—well within safe limits with room for additional items.
Seasonal Storage: Holiday decorations, camping equipment, and sporting gear typically range from 2-15 lbs per item. Even a “full” overhead storage rack 600 lbs system rarely approaches maximum capacity with these lighter items.
Tool and Hardware Storage: This is where homeowners get into trouble. Power tools, automotive parts, and hardware can be deceptively heavy. A toolbox alone might weigh 40-60 lbs fully loaded; air compressors run 50-100 lbs; automotive parts quickly add up.
The consensus among Canadian installers? Plan for 60-70% of rated capacity as your practical maximum. This provides safety margin for installation variations, aging hardware, and prevents overloading individual sections.
Testing and Safety Standards
Premium brands like SafeRacks test their overhead storage rack 600 lbs products to double the rated capacity—1,200 lbs in controlled conditions. This “safety factor” provides margin for real-world installation variations and gives users confidence the structure won’t catastrophically fail.
However, no testing standard exists specifically for residential overhead garage storage in Canada. Unlike elevators or commercial shelving (which must meet CSA or ANSI standards), these remain largely unregulated. Reputable manufacturers conduct internal testing, but buyer beware—some overseas brands advertise inflated capacities without third-party verification.
What this means for Canadian buyers: stick with established brands that publish their testing methodology and provide engineering documentation. While it costs more, the peace of mind knowing your rack was actually tested to stated capacity (not just claimed) is worth the premium.
SafeRacks vs FLEXIMOUNTS Canada: Head-to-Head Comparison
Canadian buyers shopping for overhead garage storage inevitably encounter this question: SafeRacks vs FLEXIMOUNTS Canada—which offers better value? I’ve used both systems extensively and can provide honest insights into their strengths and differences.
Build Quality and Materials
SafeRacks positions itself as the premium American-made option. Their 14-gauge industrial steel C-channel beams provide exceptional rigidity, and the Grade 8 lag bolts included with every kit exceed typical residential requirements. The powder coating is noticeably thicker than competitors, important for Canadian garages where temperature and humidity fluctuations test finishes year-round.
FLEXIMOUNTS uses 14-gauge cold-rolled steel (not quite the same as SafeRacks’ industrial steel, but close) and features an integrated grid deck design that eliminates the need for separate wire decking. This reduces parts count and simplifies installation. The powder coating is adequate for most applications, though some Canadian buyers in coastal regions report minor surface rust after 3-4 years of heavy use.
Edge: SafeRacks for pure durability, FLEXIMOUNTS for design efficiency
Installation Experience
SafeRacks provides professional installation services across 40+ major Canadian cities for $150-$250 CAD. Their DIY installation kits include comprehensive instructions, but the separate frame-and-deck design means more components to assemble. Expect 4-5 hours for a typical 4×8 rack with two people.
FLEXIMOUNTS excels in DIY-friendly design. The integrated deck means fewer parts to wrangle, and their ceiling bracket system (which spans two joists) provides more forgiving installation alignment. Most Canadian buyers report completing installation in 3-4 hours. No professional installation network exists, making this strictly a DIY proposition.
Edge: FLEXIMOUNTS for DIY installation, SafeRacks if professional installation matters
Price and Value Comparison
Here’s where the SafeRacks vs FLEXIMOUNTS Canada debate gets interesting:
- SafeRacks 4×8 (600 lbs): $280-$350 CAD
- FLEXIMOUNTS 4×8 Classic (750 lbs): $209-$299 CAD
- SafeRacks 3×6 (400 lbs): $185-$240 CAD
- FLEXIMOUNTS 3×6 (450 lbs): $169-$219 CAD
FLEXIMOUNTS consistently prices 15-25% lower while often matching or exceeding weight capacity. However, SafeRacks includes premium hardware, thicker powder coating, and professional installation options that justify the premium for some buyers.
Edge: FLEXIMOUNTS for pure price-to-performance ratio
Warranty and Support
SafeRacks backs products with a lifetime warranty and maintains an extensive support network including phone, email, and live chat. Canadian buyers report responsive service, though some warranty claims require shipping products back to the US (which you’ll pay for).
FLEXIMOUNTS offers a lifetime warranty on structural components and 2-year warranty on finish. Their support is primarily email-based with slower response times reported by some Canadian customers. That said, the simpler design means fewer parts to fail or require replacement.
Edge: SafeRacks for comprehensive support and service
The Verdict for Canadian Buyers
Choose SafeRacks if you:
- Want absolute premium quality and long-term durability
- Value professional installation options in your city
- Plan to load racks near maximum capacity regularly
- Prefer American-made products and comprehensive support
Choose FLEXIMOUNTS if you:
- Prioritize value and DIY-friendly installation
- Need higher weight capacity at lower price points
- Prefer integrated deck design with fewer components
- Are comfortable with email-only customer support
Honestly, both represent solid investments for Canadian garages. Your specific priorities—budget, DIY confidence, support expectations—should guide the decision more than any inherent superiority of one brand over the other.
Garage Ceiling Shelves: Installation Best Practices
Installing garage ceiling shelves safely and effectively requires more than following basic instructions. After installing dozens of systems across Canadian garages, I’ve learned crucial lessons that manufacturer manuals often gloss over.
Pre-Installation Planning
Before you buy anything, spend time planning your garage ceiling shelves layout. Grab graph paper (or use a digital tool) and sketch your garage ceiling to scale, noting:
Fixed Obstacles: Garage door tracks, opener mechanisms, light fixtures, electrical boxes, and ductwork all constrain where you can install racks. Map these first.
Ceiling Joist Direction: Determine which way your joists run. In most Canadian garages, joists span the shortest dimension—meaning a 20′ × 20′ garage likely has joists running 20 feet parallel to the garage door.
Existing Storage: Where are wall cabinets, shelving, or hooks? Your ceiling racks should complement these, creating traffic lanes and work zones rather than random storage islands.
One clever approach from a Winnipeg contractor: photograph your garage ceiling with a level held at different dropdown heights. This reveals sight lines and clearances that aren’t obvious from ground level.
Locating and Marking Ceiling Joists
Finding ceiling joists seems straightforward until you actually try. Most Canadian garages have either painted drywall or exposed ceiling boards, each presenting unique challenges.
For drywalled ceilings, invest in a quality stud finder with deep-scan mode (around $50-$80 CAD). Cheap models struggle with the thicker drywall and insulation common in Canadian garages. Scan from multiple directions and mark potential joists with painter’s tape.
Verify your findings by drilling a small pilot hole (1/8″ diameter) at a marked location. If you hit solid wood at 1.5-2 inches depth, you’ve found a joist. No resistance after 1 inch? You hit the cavity between joists—move 16 or 24 inches (standard joist spacing) and try again.
For exposed ceiling (common in detached garages), visually identify joists and measure spacing to confirm consistency. Some older Canadian garages have irregular spacing, so measure multiple spans to catch variations.
The Installation Process
With joists located and layout planned, installation follows a systematic process:
Step 1: Mark Mounting Points
Use the rack as a template (or manufacturer’s paper template if provided) to mark lag bolt locations. Double-check that marks fall on joist centres—missing by even an inch means hitting mostly air, not wood. Level is critical here; crooked racks create stress points and look terrible.
Step 2: Pre-Drill Pilot Holes
Never skip pre-drilling! A 3/8″ lag bolt requires a 5/16″ pilot hole drilled through drywall and 2-3 inches into the joist. This prevents wood splitting (especially in older, drier lumber) and makes driving lag bolts dramatically easier.
According to the Canadian Centre for Occupational Health and Safety, proper pilot hole sizing is essential for achieving maximum holding power in residential construction.
Step 3: Mount Ceiling Brackets
Start lag bolts by hand, then use a ratchet or impact driver to tighten. Stop when the bracket compresses firmly against the ceiling—overtightening can strip threads or crack drywall. Quality racks include washer sets that distribute compression loads evenly.
Step 4: Assemble and Attach Main Frame
With ceiling brackets mounted, assembly procedures vary by brand. FLEXIMOUNTS’ integrated design means hanging the grid deck directly on brackets. SafeRacks requires building a frame first, then attaching decking. Either way, having a helper makes this phase much safer and easier.
Step 5: Final Leveling and Adjustment
Most garage ceiling shelves offer height adjustment through ceiling bracket slots or multiple bolt hole positions. Make final adjustments with the rack fully assembled but unladen. Once you load it up, adjusting becomes much harder.
Common Installation Mistakes to Avoid
Insufficient Joist Penetration: Your lag bolts must bite at least 2 inches into solid joist wood. Mounting to just drywall or shallow penetration creates pull-out risk under load.
Uneven Load Distribution: Center your heaviest items over mounting points and spread weight evenly across the rack. Clustering weight to one side creates torsion stress the structure isn’t designed to handle.
Ignoring Garage Door Clearance: Measure your garage door’s full travel arc, not just the static closed position. Many homeowners learn this lesson when their rack demolishes their opener during the first open cycle.
Poor Quality Hardware: Using substituted bolts, washers, or anchors that don’t match manufacturer specs voids warranties and compromises safety. The supplied hardware is engineered specifically for the loads and materials—use it.
One Manitoba installer shared a horror story: a homeowner substituted standard lag bolts for the Grade 8 bolts included with their SafeRacks system. Six months later, the rack sagged noticeably. Inspection revealed the inferior bolts had bent under load. The $15 saved on hardware cost $400 in rack replacement plus potential safety issues.
Overhead Organization System: Maximizing Your Investment
An overhead organization system transforms chaotic garage clutter into structured, accessible storage—but only if you approach it systematically. Simply installing racks and tossing bins up there defeats the purpose.
Zone-Based Storage Strategy
Professional organizers recommend dividing overhead storage into functional zones based on item usage frequency and seasonality. For Canadian households, this typically breaks down into:
Zone 1 – Seasonal Rotation (Most Accessible):
- Winter tires (summer months) / Summer tires (winter months)
- Seasonal sports equipment (skis, camping gear, beach items)
- Holiday decorations
- Seasonal clothing storage
Place these items toward the outer edges of your racks where a step ladder reaches easily. You’ll access this zone 4-6 times per year during seasonal transitions.
Zone 2 – Annual Access (Middle Areas):
- Tax documents and records (7-year retention)
- Special occasion items (party supplies, extra serving ware)
- Memorabilia and keepsakes
- Infrequently used tools or equipment
These items go in middle rack sections accessible with a standard ladder but requiring more effort than Zone 1.
Zone 3 – Long-Term Storage (Less Accessible):
- Archive boxes
- Outgrown children’s items being saved
- Inherited items awaiting decisions
- Rarely accessed collections
Position long-term storage toward rack centres or backs where retrieval requires planning and equipment. You might access these items once per year or less.
Container Selection and Labeling
The containers you choose matter as much as the rack system itself. Here’s what works best for overhead organization systems:
Clear Plastic Bins (18-27L): Perfect for frequently accessed items. Being able to see contents without opening every bin saves enormous time. Brands like Rubbermaid and Sterilite offer Canadian-specific sizes.
Heavy-Duty Totes (66-95L): For bulkier, heavier items like winter clothing or camping gear. Choose bins with reinforced rims that won’t crack under weight or temperature stress. Remember, Canadian garage temperatures swing from -30°C to +35°C depending on your province—cheap bins crack in cold.
Specialty Containers: Ornament boxes for decorations, document boxes for papers, ski bags for winter sports gear. Purpose-built containers protect contents better than generic bins.
Labeling seems obvious but requires discipline. Use a label maker or permanent marker on all six sides of bins—you never know which side will be visible when bins are stacked. Include both contents and date stored. Digital photos of bin contents (stored on your phone) create a searchable catalog that’s invaluable when you need “that thing” you haven’t seen in months.
Weight Distribution and Safety
Your overhead organization system’s longevity depends on proper load management. Follow these guidelines:
Maximum Weight per Bin: Limit individual bins to 15-20 lbs (7-9 kg) even though your rack supports far more total weight. This keeps lifting manageable and prevents stress concentration.
Balance Loads: Distribute weight evenly across the entire rack surface. If one side holds 200 lbs and the other 100 lbs, the imbalance creates torsion stress that accelerates wear.
Leave Access Corridors: Don’t pack racks 100% full. Leave gaps between bin rows for air circulation and easy access. Jammed-full racks frustrate users and lead to unsafe acrobatics trying to reach items.
Regular Audits: Every 6-12 months, review what’s overhead. Remove items no longer needed, reorganize based on changing priorities, and check mounting hardware for loosening or wear.
Garage Ceiling Space Utilization: Creative Applications
Beyond standard storage bins, creative garage ceiling space utilization opens up possibilities most homeowners never consider. These applications work particularly well in Canadian garages where seasonal equipment demands flexible storage solutions.
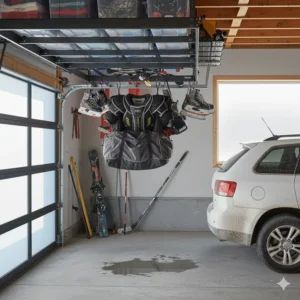
Sports Equipment Overhead Storage
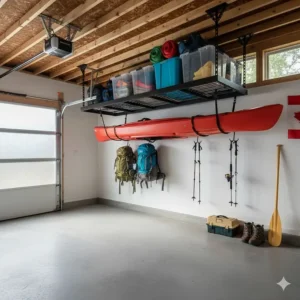
Canadian families accumulate sports equipment year-round: hockey gear, skiing equipment, kayaks, bikes, camping supplies, and more. Overhead racks handle these items beautifully with the right approach.
Hockey Gear Solution: Install pegboard or slat wall on your overhead rack’s edge or underside. Hang helmets, shin guards, and shoulder pads individually for air circulation (critical for preventing mildew). Skates go in ventilated bags to protect blades.
Kayak and Canoe Storage: Two parallel overhead racks can support kayaks or canoes horizontally, but use foam padding at contact points to prevent hull damage. Alternatively, dedicated kayak hoists (around $80-$120 CAD on Amazon.ca) lift boats vertically against garage walls, freeing ceiling racks for other uses.
Bike Hanging Systems: While dedicated bike hoists exist, many Canadian cyclists simply add bike hooks to overhead rack perimeters. This works great for storing “off-season” bikes while keeping daily riders on wall-mounted hooks at ground level.
Workshop Supply Storage
Contractors and serious DIYers use garage ceiling space utilization for workshop inventory that’s accessed irregularly:
Lumber Storage: Overhead racks excel at storing dimensional lumber (2×4s, plywood sheets) by laying boards flat across multiple rack surfaces. This beats vertical lumber racks for longer pieces and keeps material straight during storage.
Paint and Finish Storage: Dedicated shelving sections for paint cans, stains, and finishes keep these items organized and away from floor-level temperature extremes. Use plastic totes to contain potential spills—trust me, you don’t want paint cans falling from ceiling height.
Hardware Organization: Small parts bins (the plastic drawer-style organizers) mount to overhead rack edges using cable ties or custom brackets. This keeps screws, nails, and fasteners organized without consuming valuable wall or workbench space.
Seasonal Decoration Mastery
Canadian holidays mean serious decoration storage needs: Christmas, Halloween, Thanksgiving, Canada Day, and more. Overhead garage ceiling space utilization provides perfect solutions:
Christmas Storage: Dedicate one rack section exclusively to Christmas. Use specialized ornament boxes, wreath containers, and light storage reels. Label boxes by room (“Living Room,” “Outdoor,” “Tree”) for easy setup. One 4×8 ft rack holds decorations for an average 2,500 sq ft home with room to spare.
Rotating Holiday System: Store all holidays together and rotate bins based on the calendar. January through October? Christmas bins go to the back; Halloween and Thanksgiving items come forward. November? Reverse the process.
Protection Strategies: Wrap delicate decorations in bubble wrap or tissue paper before binning. Canadian temperature extremes can make plastics brittle—a little extra protection prevents discovering broken treasures when you pull bins down next year.
According to a 2024 survey by the Canadian Home Builders’ Association, 73% of Canadian homeowners identified seasonal storage as their number one garage organization challenge. Overhead systems directly address this pain point by dedicating ceiling space specifically to items used only part of the year.
Ceiling Storage Installation: Tools and Techniques
Professional-quality ceiling storage installation requires specific tools, techniques, and understanding of structural principles. While manufacturer instructions cover basics, these insider tips ensure superior results.
Essential Tools for Installation
Power Tools:
- Cordless impact driver (minimum 18V with 1,500+ in-lbs torque)
- Hammer drill with 3/8″ masonry bit (for concrete ceiling applications)
- Circular saw or miter saw (for custom modifications if needed)
- High-quality stud finder with deep-scan mode
Hand Tools:
- 6-foot and 4-foot levels
- Measuring tape (25-foot minimum)
- Socket set with 1/2″ drive ratchet (for lag bolts)
- Adjustable wrenches
- Carpenter’s square
Safety Equipment:
- Safety glasses (non-negotiable when working overhead)
- Work gloves
- Sturdy ladder or scaffolding
- Hard hat (recommended for ceiling work)
Support Equipment:
- Two sawhorses or assembly table
- Work light for ceiling inspection
- Chalk line for marking installation lines
Canadian contractors emphasize that trying to shortcut tool requirements leads to frustration and poor results. Borrowing from friends, renting from Home Depot or Canadian Tire for a day, or investing in quality tools all beat struggling with inadequate equipment.
Advanced Installation Techniques
Joist Reinforcement for Heavy Loads:
If you plan to max out your rack’s weight capacity (especially 600+ lb systems), consider reinforcing joists at mounting points. A 2×6 or 2×8 “sister joist” attached alongside the original joist with construction adhesive and structural screws spreads load over a larger area.
This technique is particularly relevant in older Canadian homes (pre-1990) where ceiling joists may be undersized by modern standards. Calgary and Edmonton homes from the 1970s-80s sometimes feature ceiling joists smaller than current code requirements.
Temperature Expansion Considerations:
Canadian garages experience temperature swings that would horrify structural engineers in temperate climates. Steel expands and contracts with temperature—not dramatically, but enough to stress rigid connections over time.
Leave slight slack in your installation rather than cranking everything down with maximum torque. This gives materials micro-movement room during expansion/contraction cycles. Overtightening is tempting, but experienced installers know quarter-turn-looser-than-maximum extends system life.
Dealing with Obstructions:
Light fixtures, electrical boxes, ductwork, and garage door opener mechanisms complicate installations. Rather than compromising rack position, remove or relocate obstructions when practical:
- Garage lights can often be switched to low-profile LED panels
- Electrical boxes can be extended with box extenders
- Ductwork may be reroutable (consult an HVAC tech)
- Garage door openers sometimes relocate with rail extensions
Multi-Rack Alignment:
Installing multiple racks? Create a reference line across your entire ceiling using a laser level (borrow or rent one—they’re worth it). This ensures all racks hang at identical heights, creating a professional, cohesive appearance rather than the “handyman special” look of misaligned storage.
Troubleshooting Common Issues
Rack Won’t Level:
Ceiling joists themselves may not be perfectly level. If one mounting point is 1-2 inches different from others, you have options: shim up lower points with plywood spacers, or accept slight rake (less than 2 degrees won’t affect function).
Lag Bolts Won’t Tighten:
Either you’re missing the joist entirely (reposition and drill new pilot hole), the pilot hole is too large (drill slightly offset hole), or the joist wood is compromised (sister in reinforcement). Never use drywall anchors or toggle bolts for overhead load-bearing applications—they will fail catastrophically.
Garage Door Interference:
You miscalculated clearance and your rack hits the garage door when opening. If it’s close, sometimes adjusting rack height (moving to different bolt holes) provides necessary clearance. Otherwise, you’re moving the rack—no shortcuts here.
FAQs About Overhead Garage Storage Racks
❓ How much weight can overhead garage storage racks safely hold in Canadian climates?
❓ What is the best ceiling storage rack 4x8 option for Canadian homeowners in 2026?
❓ Can overhead garage storage racks be installed in condos with lower ceiling heights?
❓ How do I know if my garage ceiling can support 600 lbs overhead storage racks in Canada?
❓ Where can I buy overhead storage rack 600 lbs systems with fast shipping in Canada?
Conclusion: Transform Your Canadian Garage Today
Overhead garage storage racks represent one of the highest-value home improvements you can make. For an investment of $169-$350 CAD and a weekend afternoon, you gain 60-120 cubic feet of organized storage that would otherwise cost $200+ monthly in rental storage fees.
Throughout this guide, I’ve shared real-world insights from Canadian homeowners who’ve successfully transformed cluttered garages into organized spaces. Whether you choose the value-leading FLEXIMOUNTS systems, premium SafeRacks quality, or the veteran-owned MonsterRax brand, each option delivers reliable performance suited to Canadian conditions.
The key takeaways? Measure carefully, verify ceiling joist capacity, distribute weight evenly, and choose quality products from established brands. Skip the ultra-cheap overseas options that appear on Amazon—they often disappoint with poor hardware, inadequate instructions, and questionable safety margins.
Your garage deserves better than being a dumping ground for seasonal items, camping gear, winter tires, and holiday decorations. Take advantage of that wasted ceiling space and reclaim your garage for parking, workshops, and actual functionality. The investment pays for itself in recovered storage costs within 18-24 months while adding tangible value to your home.
Ready to get started? Review the comparison table at the top of this guide, select a system matching your budget and capacity needs, and transform your Canadian garage from chaos to organized efficiency. Your future self will thank you every time you pull into a spacious, organized garage instead of navigating an obstacle course of clutter.
Recommended for You
- 7 Best Metal Storage Cabinet Garage Canada 2026
- 7 Best Heavy Duty Bike Storage Rack Canada 2026
- 7 Best Ceiling Bike Storage Pulley Systems Canada 2026 | Space-Saving Guide
Disclaimer: This article contains affiliate links to Amazon.ca. If you purchase products through these links, we may earn a small commission at no additional cost to you.
✨ Found this helpful? Share it with your friends! 💬🤗