
In This Article
Nobody warns you about the sound. That’s the thing about a garage insulation for -30 winters project — you don’t start it because of a spec sheet, you start it because your garage door groans like a dying accordion every time the mercury drops past minus twenty-five, and your coffee has a skin of ice on it by 7 a.m. even though the door’s been shut all night. Across the Prairies and the North, an uninsulated garage isn’t a mild inconvenience. It’s a battery-killing, pipe-freezing, tool-cracking liability that turns a simple errand into a math problem about frostbite exposure time.
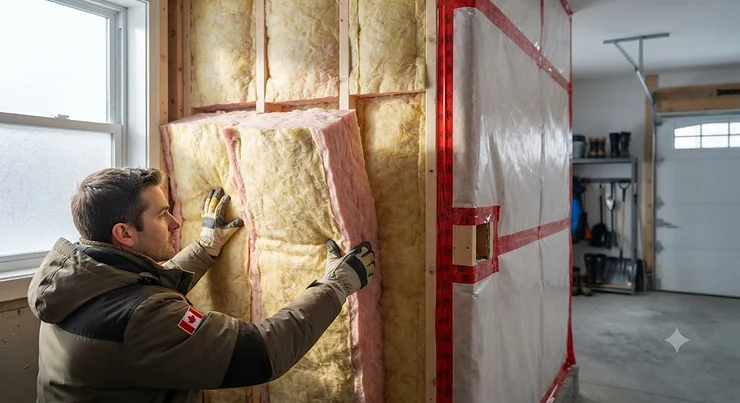
Garage insulation for -30 winters refers to a layered thermal and moisture-control system — rigid foam or batt insulation on the walls and ceiling, a properly placed vapour barrier, air-sealed penetrations, and an insulated door — engineered to hold heat and keep condensation out even at extreme sub-zero temperatures. It’s not one product; it’s a system, and buying the wrong piece of that system is how people end up with mouldy drywall behind a “well-insulated” wall two winters later.
This guide breaks down seven real, currently available products that cover every layer of that system, from rigid foam board to garage door kits to the humble but critical roll of poly sheeting. We’ll walk through actual R-values, what reviewers consistently report after living with these products through a real Canadian winter, and where the marketing claims start to wobble once the thermometer hits -30°C. According to Natural Resources Canada’s guide to insulation materials and vapour barriers, choosing the right combination — not just the highest R-value number — is what actually determines whether a garage stays warm and dry.
Quick Comparison Table
| Product | Type | R-Value | Best For | Price Range (CAD) |
|---|---|---|---|---|
| Owens Corning FOAMULAR 250 | XPS rigid foam board | R-5/inch | Walls, ceilings, cold-climate reliability | C$45–C$65 per 4×8 sheet |
| ROCKWOOL Comfortbatt R14 | Stone wool batt | R-14 | Stud cavity walls, fire/moisture safety | C$75–C$95 per bag |
| GREAT STUFF PRO Gaps & Cracks | Spray foam sealant | R-6/inch (localized) | Sealing thermal bridging points | C$20–C$30 per can |
| Frost King 6 Mil Poly Sheeting | Vapour barrier film | N/A (moisture control) | Warm-side vapour barrier | C$40–C$60 per roll |
| Matador Garage Door Insulation Kit | Rigid foam door panels | ~R-4.6 | Budget single-door retrofit | C$110–C$150 per kit |
| NASA TECH Reflective Foam Core Kit | Foil-faced foam door panels | R-8 | Double garage door, full coverage | C$150–C$210 per kit |
| Reflectix Reflective Insulation Roll | Reflective bubble foil | ~R-1 (air-gap dependent) | Supplemental radiant layer | C$25–C$40 per roll |
Looking at this table, the pattern that jumps out is that no single product on this list is a complete solution on its own — the Owens Corning FOAMULAR 250 and ROCKWOOL Comfortbatt R14 handle the big surface-area heat loss through walls and ceiling, while GREAT STUFF PRO Gaps & Cracks and the Frost King 6 Mil Poly Sheeting quietly do the unglamorous work of stopping air and moisture from undoing all that R-value. Garages with an uninsulated door lose disproportionate heat through that one panel, which is exactly why the Matador and NASA TECH kits earn their spot even though they cover the smallest surface area in the room.
💬 Just one click — help others make better buying decisions too!😊
Top 7 Garage Insulation for -30 Winters Products: Expert Analysis
1. Owens Corning FOAMULAR 250 — best reliable R-value per inch in real cold
The pink boards from Owens Corning FOAMULAR 250 deliver a consistent R-5 per inch of extruded polystyrene (XPS), and that number matters more in a Canadian garage than almost anywhere else in the house. Unlike polyiso, which loses a meaningful chunk of its rated performance as temperatures drop, XPS is chemically stable across the temperature swings a Prairie garage actually sees — from a balmy +20°C afternoon in April to -35°C with wind chill in January.
Made in Canada and rated for compressive strengths up to 20-100 PSI depending on the line, this board can go directly against masonry walls, over stud cavities as continuous insulation, or cut into a garage door’s recessed panels. What most buyers overlook is that XPS’s closed-cell structure also gives it real moisture resistance, which matters enormously in a space where snowmelt off a parked vehicle turns the floor and lower walls into a humidity generator for hours after you pull in.
Based on aggregated reviews across retailer and contractor forums, users consistently report that the biggest complaint isn’t performance — it’s that the boards are bulky to transport and require a sharp utility knife or a foam saw for clean cuts, especially at the thicker 2-inch profile. Reviewers who paired it with proper furring strips and screws (rather than adhesive alone) reported the fewest long-term issues with sagging or bowing.
Pros:
- ✅ Stable R-5/inch performance even in extreme cold
- ✅ Closed-cell structure resists moisture and won’t wick water
- ✅ Manufactured in Canada, widely stocked at major retailers
Cons:
- ❌ Heavy and bulky — awkward for a solo DIY install
- ❌ Requires taped seams and furring for a finished look
At around C$45-C$65 per 4×8 sheet depending on thickness, the Owens Corning FOAMULAR 250 sits in the mid-range of rigid foam pricing, and for a garage aiming at true -30°C performance on the walls, it’s hard to argue with the value.
2. ROCKWOOL Comfortbatt R14 — best moisture-and-fire-safe stud cavity fill
If your garage has open stud cavities — the classic setup in a 2×4 or 2×6 framed detached garage — ROCKWOOL Comfortbatt R14 is the batt insulation that keeps showing up in contractor recommendations for cold-climate builds, and there’s a reason beyond marketing. Stone wool doesn’t absorb water the way fibreglass can, and it holds its R-value even if it gets briefly damp, which is a genuinely useful trait in a space with a leaky overhead door and occasional snow tracked in on boots and tires.
The semi-rigid batt has a flexible edge engineered to compress on insertion and spring back to fill the stud cavity completely, which addresses one of the most common installation failures with cheaper batt products: gaps at the edges that quietly undermine the rated R-value. At R-14 in a standard 2×4, 16-inch on-centre cavity, this product gets a typical garage wall close to code-minimum performance for many cold-climate zones, though pairing it with an inch of exterior rigid foam (like the FOAMULAR above) pushes it meaningfully higher and helps address thermal bridging through the studs themselves.
Aggregated reviewer sentiment is notably positive on the sound-dampening side effect — several DIYers doing garage workshop conversions specifically mention how much quieter power tools sound with Comfortbatt in the walls compared to their old fibreglass. The recurring critique is itch and dust during installation, which is standard for any mineral wool product and manageable with gloves and a basic respirator.
Pros:
- ✅ Retains R-value even when briefly exposed to moisture
- ✅ Non-combustible with a high melting point for fire safety
- ✅ Flexible edge design reduces gapping at stud cavities
Cons:
- ❌ Itchy to handle without gloves and long sleeves
- ❌ Lower R-value per inch than rigid foam alternatives
Priced around C$75-C$95 per bag covering roughly 60 square feet, ROCKWOOL Comfortbatt R14 is a mid-range choice that rewards buyers who pair it correctly with an exterior air barrier rather than relying on the batt alone.
3. GREAT STUFF PRO Gaps & Cracks — best for killing thermal bridging at the source
Here’s what the spec sheet won’t tell you: you can install R-40 worth of insulation in your garage and still lose a shocking amount of heat if the gaps around outlets, sill plates, and framing penetrations are left unsealed. That’s precisely the job GREAT STUFF PRO Gaps & Cracks is built for. This gun-applied, closed-cell polyurethane spray foam expands to fill irregular gaps up to three inches, curing into a fireblock-rated, water-resistant seal around plumbing, wiring, and structural penetrations.
On paper this means roughly R-6 per inch, but the real value isn’t the R-value number — it’s that it eliminates the convective air leaks that batt and rigid foam simply can’t stop on their own. In a garage exposed to -30°C wind chill, even a quarter-inch gap around a electrical box can create a cold draft that a homeowner will feel as a persistent chill despite “good” wall insulation.
Reviewers consistently note the tack-free cure time of 3-10 minutes and full trim-readiness within the hour as a genuine time-saver on weekend projects, and the fire-block orange colour makes inspection easy later. The most common complaint in aggregated feedback is overuse — because it expands significantly, first-time users tend to apply too much and end up trimming excess, which is more a technique issue than a product flaw.
Pros:
- ✅ Seals irregular gaps other insulation types can’t reach
- ✅ Fireblock rated for code-relevant applications
- ✅ Fast tack-free cure speeds up weekend installs
Cons:
- ❌ Expands aggressively — easy to overapply as a beginner
- ❌ Requires a dedicated foam gun for controlled dispensing
At C$20-C$30 per can, this is one of the lowest-cost items on this list relative to the thermal bridging it eliminates, making it arguably the best value-per-dollar entry in the entire lineup.
4. Frost King 6 Mil Polyethylene Sheeting — the vapour barrier every layer above depends on
This is the product that gets skipped most often — and it’s the one that causes the most expensive mistakes down the line. Frost King 6 Mil Polyethylene Sheeting is a straightforward polyethylene film used as a vapour barrier on the warm side of wall insulation, and in a garage where interior humidity swings dramatically (melting snow, a running vehicle, even a space heater), getting this layer right is not optional in a genuinely cold climate.
The 6 mil thickness meets the general baseline most Canadian builders reach for, and the film needs to go on the heated-side face of the insulation — never sandwiched between two insulation layers, and never on the exterior in a cold climate, or moisture gets trapped in the wall cavity and causes rot or mould over a few seasons. What most buyers overlook is that taping seams properly (rather than just overlapping the sheeting) is what separates a functional vapour barrier from a decorative one.
Because this is a commodity building material rather than a branded lifestyle product, dedicated customer reviews are sparser than for something like a garage door kit, and honestly, that’s appropriate — this isn’t a product you fall in love with, it’s a product you install correctly once and forget about. Where reviews do exist, they focus almost entirely on tear resistance during installation, with most buyers reporting the film handles staple guns and careful stretching without ripping, provided it isn’t over-stretched around corners.
Pros:
- ✅ Meets standard 6 mil thickness for residential vapour control
- ✅ Affordable per square foot compared to specialty barrier films
- ✅ Widely available at Canadian hardware and building supply stores
Cons:
- ❌ Easy to install incorrectly (wrong side, unsealed seams)
- ❌ Offers zero thermal value on its own — moisture control only
At roughly C$40-C$60 for a roll covering a mid-size garage wall run, this is inexpensive insurance against the single most common and most expensive mistake in cold-climate garage insulation projects.
5. Matador Garage Door Insulation Kit — best budget garage door retrofit
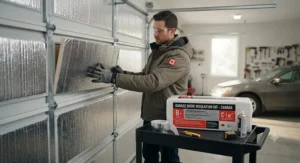
An uninsulated steel garage door has an R-value around R-0.5 — genuinely worse than a single-pane window — which is why the Matador Garage Door Insulation Kit consistently ranks as one of the highest-impact, lowest-cost upgrades for a cold garage. This kit includes eight high-impact polystyrene laminate panels sized to fit into the recessed sections of a standard raised-panel door, without needing to remove the door from its track.
Designed to fit the existing framework of a standard door rather than an after-market hurricane brace setup, installation typically runs under an hour with basic hand tools, and the panels are light enough that most standard garage door springs and openers handle the added weight without needing a rebalance. Based on the spec comparison with foil-faced foam alternatives, the trade-off here is durability and rigidity versus a slightly lower R-value ceiling — this is a solid, panel-based system rather than a soft foam-core one.
Aggregated review sentiment consistently praises the fit-and-forget nature of the install and the noticeable reduction in door “boom” noise during high winds. The most repeated criticism is that the white polystyrene panels can look slightly utilitarian from the garage interior compared to premium finished kits, though this is a cosmetic trade-off rather than a functional one.
Pros:
- ✅ No door removal required for installation
- ✅ Lightweight panels won’t strain garage door openers
- ✅ Under an hour to install with basic tools
Cons:
- ❌ Utilitarian white finish lacks a premium look
- ❌ Lower R-value than foil-faced foam-core alternatives
Priced around C$110-C$150 per kit for a single-car door, this is one of the best dollar-for-dollar upgrades on this entire list for anyone tackling garage insulation prairies winter conditions on a tight budget.
6. NASA TECH White Reflective Foam Core Kit — best full-coverage door kit for double garages
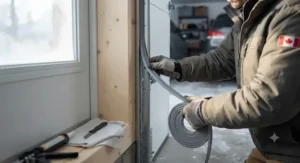
Stepping up in both coverage and R-value, the NASA TECH White Reflective Foam Core Kit is built specifically for larger double garage doors and delivers a rated R-8 — a meaningful jump over basic reflective film products. The kit uses a reflective foam-core panel system with heavy-duty double-sided tape rather than the loose panel-and-frame approach, which several reviewers note makes it faster to install solo compared to multi-piece rigid systems.
Here’s the honest analytical read: reflective foil-faced products only achieve their full rated R-value when there’s an air gap between the foil surface and the next layer, and this kit’s foam core is what makes that R-8 figure legitimate rather than aspirational — a flat sheet of foil alone against a metal door panel underperforms its label significantly, as independent insulation research on reflective products confirms. This is precisely why a foam-core kit like this one outperforms a basic bubble-foil product for door applications specifically.
Reviewer sentiment aggregated across retail listings is strongly positive on ease of install and the visible drop in interior garage temperature swing during cold snaps, with several buyers specifically mentioning it as a fix for a bedroom located above the garage that previously ran noticeably colder than the rest of the house. The recurring complaint involves the double-sided tape losing grip in extreme heat during summer storage of the leftover kit materials — not a winter performance issue.
Pros:
- ✅ Rated R-8 with a legitimate air-gap foam-core design
- ✅ Sized for double garage doors up to 18 feet wide
- ✅ Faster tape-based install than panel-and-frame kits
Cons:
- ❌ Higher price point than basic reflective rolls
- ❌ Tape adhesion can weaken if stored in high heat
At C$150-C$210 per kit, the NASA TECH White Reflective Foam Core Kit commands a premium over the Matador option, but for a double-door garage in a genuine -30°C climate zone, the extra R-value and full coverage generally justify the added cost.
7. Reflectix Reflective Insulation Roll — best supplemental layer, with honest caveats for cold climates
Reflectix Reflective Insulation Roll is the product most likely to be misunderstood, so let’s be direct about it: this double-bubble aluminum foil roll is genuinely useful as a supplemental radiant barrier, but it is not a standalone solution for garage insulation for -30 winters, and treating it as one is a common and costly mistake. Reviewers and independent insulation guides consistently point out that its reflective performance depends entirely on having an air gap on at least one side — installed flat against a garage door panel with no gap, real-world performance drops well below the printed rating.
Where this product legitimately earns its spot on this list is as a supplemental layer behind rigid foam board (creating that necessary air gap), around ductwork, or as an added radiant layer on an attic hatch or overhead door where a small air space is achievable. It’s also inexpensive and easy to cut to size with household scissors, which makes it a low-commitment way to address smaller trouble spots without a major renovation.
Aggregated customer feedback is mixed specifically because expectations vary — buyers who understood the air-gap requirement report solid supplemental performance, while buyers who installed it flush against metal expecting attic-level results report disappointment. That split in reviews is itself useful data: the product works as designed, but the design has a specific, often-missed requirement.
Pros:
- ✅ Inexpensive and easy to cut and install with basic tools
- ✅ Effective radiant barrier when installed with an air gap
- ✅ Lightweight — adds negligible load to doors or ceilings
Cons:
- ❌ Performance drops sharply without a proper air gap
- ❌ Not a substitute for rigid foam or batt in extreme cold
At C$25-C$40 per roll, treat this as a supporting player rather than the star of your insulation plan, and it earns its keep.
Practical Usage Guide: Installing Garage Insulation for -30 Winters
Getting the sequence right matters as much as the products themselves. Start with air sealing before anything else — run GREAT STUFF PRO Gaps & Cracks around every penetration, the rim joist, and the sill plate first, because insulating over an air leak just hides the problem instead of solving it. Once that’s cured and trimmed, install your bulk insulation: ROCKWOOL Comfortbatt R14 into open stud cavities, or Owens Corning FOAMULAR 250 as continuous exterior or interior rigid foam over masonry and framing alike.
Next comes the vapour barrier, and this is where the 30-day mistake list gets long. The Frost King 6 Mil Polyethylene Sheeting goes on the warm (interior, heated) side of the insulation, stapled to studs with every seam overlapped by at least six inches and taped — not just overlapped loosely. In an unheated detached garage that occasionally gets warmed by a space heater, the “warm side” is still the interior-facing side, since that’s where the moisture-laden air originates when you’re inside working.
For the door itself, measure the exact panel dimensions before ordering either the Matador Garage Door Insulation Kit or the NASA TECH White Reflective Foam Core Kit — standard sizing covers most residential doors, but custom or older doors sometimes need trimming. Maintenance is minimal: check tape adhesion on foam-core door kits every fall before the cold really sets in, inspect vapour barrier seams for tears if you’ve done any wall-mounted shelving since installation, and re-caulk any new gaps around outlets or fixtures added after the original install. A once-a-year, fifteen-minute inspection catches the small failures before they become expensive ones.
The single most common first-30-days mistake, based on aggregated installer and DIY-forum reports, is skipping the air-sealing step entirely and jumping straight to batt insulation — it looks finished faster, but it performs noticeably worse in testing and in real winters.
Real-World Scenarios: Matching Insulation to Your Prairie Garage
Consider three different garage owners, each with a genuinely different best answer.
The first is a Saskatoon homeowner with a detached, unheated double garage used mainly for vehicle storage and winter tire changes. Budget is the priority, and the garage will never be heated to living-space temperatures. For this scenario, the Matador Garage Door Insulation Kit paired with Owens Corning FOAMULAR 250 on the most exposed north wall delivers the biggest comfort gain — enough to keep a car battery from dying and hands from going numb during a tire swap — without the cost of a full envelope retrofit.
The second is a Winnipeg family converting an attached garage into a heated home gym they’ll use several times a week through winter. Here, the calculus changes completely: full wall and ceiling coverage with ROCKWOOL Comfortbatt R14, a properly sealed Frost King 6 Mil Polyethylene Sheeting vapour barrier, and the NASA TECH White Reflective Foam Core Kit on the double door are all justified, because this space is functionally becoming conditioned living space and needs to perform like one.
The third is a rural Alberta acreage owner with a detached workshop garage who already has decent wall insulation from a previous owner but suffers from persistent drafts and a door that “just never feels sealed.” This is a targeted-fix scenario: GREAT STUFF PRO Gaps & Cracks for the framing gaps, plus a Reflectix Reflective Insulation Roll installed with a proper air gap behind the existing door panels, solves the specific complaint without tearing into walls that are otherwise doing their job.
Problem → Solution: Common Cold-Climate Garage Insulation Headaches
Problem: Frost or ice forming on the inside of garage walls. This is almost always a vapour barrier failure — either it’s missing, installed on the wrong side, or has unsealed seams letting warm, moist interior air condense inside a cold wall cavity. Solution: install or repair the Frost King 6 Mil Polyethylene Sheeting on the warm side with fully taped seams.
Problem: The garage feels insulated but there’s still a persistent draft near outlets or the header. This points to thermal bridging and air leakage that bulk insulation alone doesn’t address. Solution: seal every penetration with GREAT STUFF PRO Gaps & Cracks before adding or supplementing batt insulation.
Problem: The garage door radiates cold even after adding a basic foil kit. This usually means the reflective layer was installed flush against the metal door with no air gap, which guts its rated performance. Solution: switch to a foam-core kit like NASA TECH White Reflective Foam Core Kit, which builds the required air gap into the panel design.
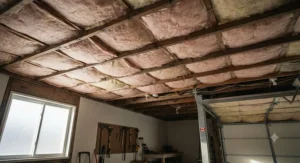
Problem: A room above the garage stays noticeably colder than the rest of the house. The garage ceiling is often the weakest link in the whole system because it doubles as the floor of a heated space above. Solution: prioritize ROCKWOOL Comfortbatt R14 or Owens Corning FOAMULAR 250 on the ceiling before the walls, since heat loss through an uninsulated garage ceiling directly undercuts the room above it.
Problem: Budget doesn’t stretch to a full insulation overhaul this winter. Solution: sequence the work — air sealing and the door kit first (cheapest, highest impact), walls and vapour barrier next season, since a phased approach still delivers meaningful comfort gains at each stage.
How to Choose the Best R-Value Garage Insulation for Cold Climate
- Start with your climate zone, not a generic R-value chart. Prairie and Northern regions routinely need wall R-values in the R-19 to R-24 range and ceiling values well above what southern Ontario guides recommend, so cross-reference your specific location before buying.
- Prioritize air sealing before comparing R-values. A high R-value product installed over unsealed gaps underperforms a modest R-value product installed with excellent air sealing — this is one of the most consistently misunderstood points among first-time buyers.
- Match the material to its actual cold-weather behaviour. XPS holds its rated performance in deep cold; polyiso’s real-world R-value drops as temperatures fall, which matters enormously for garage insulation for -30 winters specifically.
- Never skip the vapour barrier calculation. Placement matters as much as presence — a vapour barrier on the wrong side of the insulation can trap moisture and cause more damage than having none at all.
- Budget for the door separately from the walls. An insulated garage door often delivers the single biggest comfort improvement per dollar spent, since uninsulated steel doors perform worse than a single-pane window.
- Check compressive strength if insulating a floor or slab-adjacent area. Rigid foam boards vary significantly in load-bearing capacity, and the wrong PSI rating under a workbench or vehicle path will compress and lose R-value over time.
- Read aggregated reviews for installation reality, not marketing copy. Products with consistent complaints about a specific failure mode (tape adhesion, panel warping, seam tearing) are telling you something worth factoring into your decision.
Insulate Garage for Extreme Cold Canada: A Step-by-Step Framework
Deciding how far to take a garage insulation for -30 winters project comes down to how the space gets used. If you’ll never heat it and it’s purely for parking and storage, a partial approach — door kit plus targeted air sealing — captures most of the practical benefit for a fraction of the cost of a full retrofit. If the garage is attached and shares walls or a ceiling with living space, insulating it properly isn’t optional in the same way; heat loss there directly inflates your home heating bill and can create cold spots in adjacent rooms.
For genuinely extreme cold, sequence your investment as follows: door insulation and air sealing first, since these are the cheapest interventions with the most noticeable impact; ceiling insulation second, especially in attached garages with living space above; wall insulation third, prioritizing the walls facing prevailing winter winds; and a proper, sealed vapour barrier throughout, installed as you go rather than retrofitted later. As Natural Resources Canada notes on basement and below-grade insulation, below-grade and partially conditioned spaces can account for a substantial share of a home’s total heat loss, and an attached garage functions similarly in the building envelope, which is why treating it as an afterthought tends to backfire on overall home comfort and energy bills.
Garage Insulation Prairies Winter: Region-Specific Considerations
Prairie winters bring a specific combination that differs from milder Canadian climates: extended stretches of -30°C to -40°C with wind chill, minimal winter humidity outdoors but significant indoor humidity spikes from melting snow and vehicle exhaust, and dramatic seasonal temperature swings that stress-test materials more than a moderate coastal climate would. This combination is exactly why XPS rigid foam and stone wool batt consistently outperform reflective-only or budget fibreglass options in Prairie garages specifically — they hold their rated performance across that full swing rather than degrading at the extremes.
Wind exposure is also a bigger factor on the open Prairies than in more sheltered urban or coastal settings. A detached garage on an acreage with no windbreak experiences far more convective heat loss through any unsealed gap than the same structure in a sheltered subdivision, which tips the priority list further toward aggressive air sealing with a product like GREAT STUFF PRO Gaps & Cracks before spending heavily on incremental R-value upgrades. Homeowners in Saskatchewan, Manitoba, and Alberta consistently report in aggregated forum discussion that addressing drafts around the garage door and wall penetrations produced a more noticeable comfort improvement than simply adding a thicker batt.
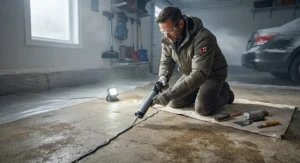
Foam Board Insulation Extreme Cold: XPS vs EPS vs Polyiso Explained
Not all rigid foam performs the same way once temperatures fall off a cliff, and this is one of the most consistently misunderstood aspects of foam board insulation extreme cold shoppers run into. XPS (extruded polystyrene), like the Owens Corning FOAMULAR 250, delivers a stable R-5 per inch across a wide temperature range and offers strong moisture resistance thanks to its closed-cell structure — making it the go-to choice for below-grade, high-humidity, or genuinely extreme-cold applications.
EPS (expanded polystyrene) comes in lower, around R-3.8 to R-4 per inch, and costs less, but its bead-based structure is slightly more permeable to moisture than XPS, which matters more in a garage than in a dry attic. Polyiso, meanwhile, offers the highest rated R-value per inch under warm laboratory conditions — around R-6 to R-6.5 — but here’s the honest analytical catch: polyiso’s actual thermal performance drops measurably as temperatures fall, which is precisely the opposite of what you want in a product marketed for cold-climate use. For a genuine -30°C garage, that makes XPS the more reliable choice despite its slightly lower on-paper number, a nuance that a lot of comparison charts gloss over entirely.
Vapor Barrier Cold Climate: Placement Rules You Can’t Skip
A vapor barrier cold climate installation lives or dies on one rule: it goes on the warm side of the insulation, full stop. A vapour barrier’s effectiveness is measured by its permeability rating — the lower the perm rating, the more effective the moisture barrier — and materials like polyethylene sheeting — such as the Frost King 6 Mil Polyethylene Sheeting — are specifically chosen because they achieve a very low perm rating at an accessible price point.
Get the placement backwards, and warm interior air migrates through the wall assembly, hits the cold zone near the exterior sheathing, and condenses inside the cavity where nobody can see it happening until drywall starts staining or studs start rotting two or three winters later. Seams matter just as much as placement: every overlap should be taped or sealed, not just loosely lapped, because even a small gap gives moisture-laden air a pathway around the barrier rather than through it. In an attached garage specifically, pay close attention to the shared wall with the house — a continuous, unbroken vapour barrier there does double duty by also helping limit any drift of fumes or humidity between spaces.
Thermal Bridging Garage Insulation: The Silent Heat Thief
Thermal bridging garage insulation problems are the reason a wall with “good” batt insulation can still feel cold to the touch in spots. Wood and especially steel studs conduct heat far more readily than the insulation between them, creating a literal bridge for heat to escape even when the cavity itself is properly filled. Natural Resources Canada’s guidance on insulating walls points out that continuous insulation and an unbroken air and vapour barrier running without breaks are what actually prevent this kind of thermal bridging, which is exactly why pairing batt insulation with a layer of continuous exterior rigid foam — Comfortbatt in the cavity, FOAMULAR 250 over the studs — outperforms either product used alone.
The practical fix doesn’t require an engineering degree: add even one inch of continuous rigid foam over framing before drywall or siding goes up, and you interrupt the direct conductive path through every stud. For garages where that level of renovation isn’t in the budget this season, targeted spray foam sealing around the highest-risk bridging points — window and door framing, corners, and top and bottom plates — using GREAT STUFF PRO Gaps & Cracks captures a meaningful chunk of the benefit for a fraction of the cost.
Garage Insulation vs Traditional Alternatives
| Approach | Typical R-Value | Moisture Handling | Best Use Case |
|---|---|---|---|
| Rigid foam + vapour barrier system (this guide) | R-19 to R-30+ | Excellent when installed correctly | Genuine -30°C performance, attached or heated garages |
| Basic fibreglass batt, no vapour barrier | R-11 to R-19 | Poor — prone to trapped moisture | Mild climates, unheated storage only |
| No insulation, door seal only | R-0.5 to R-2 | N/A | Budget-limited, minimal-use detached garages |
| Full spray foam encapsulation | R-6 to R-7/inch, air-sealed | Excellent, acts as its own air barrier | New builds or major renovations with professional install |
Comparing these approaches, the layered system built around the Owens Corning FOAMULAR 250, ROCKWOOL Comfortbatt R14, and Frost King 6 Mil Polyethylene Sheeting sits in a sweet spot most Prairie homeowners can actually execute themselves over a weekend or two, without needing a professional spray foam crew. Basic fibreglass without a vapour barrier is a false economy in a genuinely cold climate — it looks like insulation but invites the moisture problems this whole guide is designed to help you avoid. Full professional spray foam encapsulation delivers the best all-in-one performance but at a materially higher cost, making it the right call mainly for new construction or a full-scale renovation rather than an incremental upgrade.
Long-Term Cost & Maintenance: ROI of Insulating a Prairie Garage
The upfront cost of a full garage insulation for -30 winters retrofit — walls, ceiling, door, vapour barrier, and air sealing for a standard double garage — typically lands somewhere in the C$800-C$1,600 range in materials alone, depending heavily on how much of the structure is already partially insulated. That’s a meaningful number, but it needs to be weighed against what it’s replacing: a battery that needs boosting several times a winter, tools and paint that get damaged by freeze-thaw cycles, and in attached garages, direct heat loss that shows up on the home’s utility bill every single month of the heating season.
Maintenance costs after installation are genuinely low. Rigid foam and stone wool batt don’t degrade meaningfully over decades when kept dry, which is exactly why getting the vapour barrier right matters so much for long-term value — a moisture failure doesn’t just cost you comfort, it can mean tearing out drywall and insulation to fix rot years down the line, turning a one-time expense into a recurring one. Door kits like the Matador Garage Door Insulation Kit and NASA TECH White Reflective Foam Core Kit have the shortest practical lifespan of the components on this list, generally needing a tape or panel refresh after five to eight years of temperature cycling, but even that replacement cost is modest compared to the original investment.
Common Mistakes When Buying Garage Insulation for -30 Winters
The most expensive mistake, by a wide margin, is buying insulation before addressing air sealing — it’s the equivalent of buying a great winter coat and leaving it unzipped. A close second is installing a vapour barrier on the wrong side of the wall assembly, which can actively make moisture problems worse rather than solving them. Buyers also frequently underestimate the garage door’s impact on overall comfort, spending heavily on wall insulation while leaving an R-0.5 door as the weakest link in the entire envelope.
Another recurring pitfall is assuming a reflective foil product alone will match rigid foam performance in genuine cold-climate conditions — as covered earlier, foil-only products need an air gap to hit their rated numbers, and skipping that detail leads to disappointing real-world results. Finally, many DIYers skip taping seams on both rigid foam boards and vapour barrier sheeting, treating overlap alone as sufficient; in a -30°C climate with real pressure differentials across the wall assembly, untaped seams are a measurable performance gap, not a minor detail.
Safety, Building Code & CSA Compliance Guide
Garage insulation projects intersect with a few genuine safety considerations worth taking seriously, especially in attached garages. CMHC’s research on carbon monoxide in Canadian houses documents this as a genuine consideration for attached garage spaces, which means air sealing between an attached garage and the living space isn’t purely an energy-efficiency measure — it also helps limit the pathway for fumes to migrate into the home, though a proper CO detector remains essential regardless of how well the space is sealed.
Fire safety matters too: spray foam sealants like GREAT STUFF PRO Gaps & Cracks carry a fireblock rating specifically because building codes require fire-resistant sealing at certain penetrations, and stone wool products like ROCKWOOL Comfortbatt R14 are non-combustible by nature, which is a genuine advantage in a space that often stores flammable materials like paint, solvents, and fuel for lawn equipment. When in doubt about local requirements — vapour barrier specifications, insulation minimums, or fire separation rules between an attached garage and the house — check with your municipal building department before finalizing material choices, since requirements can vary meaningfully between provinces and even between municipalities within the same province.
✨ Don’t Miss These Exclusive Deals!
🔍 Take your garage insulation for -30 winters project to the next level with these carefully selected products. Click on any highlighted item to check current pricing and availability. These tools will help you create a genuinely warm, dry garage your whole family will actually want to use this winter!

Frequently Asked Questions
❓ What R-value do I need for a garage in a -30 winter climate?
❓ Do I need a vapour barrier in an unheated garage?
❓ Is spray foam better than batt insulation for a garage?
❓ How much does it cost to insulate a garage door for winter?
❓ Can I insulate my garage myself or do I need a contractor?
Conclusion
A genuinely warm garage through a -30°C Prairie winter isn’t about buying the single most expensive product on the shelf — it’s about building a layered system where each piece does its specific job. Air sealing with GREAT STUFF PRO Gaps & Cracks stops the drafts that undermine everything else. Rigid foam like Owens Corning FOAMULAR 250 and batt insulation like ROCKWOOL Comfortbatt R14 handle the bulk of the heat loss through walls and ceiling. A correctly placed Frost King 6 Mil Polyethylene Sheeting vapour barrier protects that investment from moisture damage for decades. And an insulated door — whether the budget-friendly Matador Garage Door Insulation Kit or the higher-coverage NASA TECH White Reflective Foam Core Kit — closes off the single weakest point in most garage envelopes, with a Reflectix Reflective Insulation Roll available as a smart supplemental layer wherever an air gap can be achieved.
Whichever combination fits your garage, your climate zone, and your budget, the honest takeaway from real spec comparisons and aggregated reviewer experience is consistent: sequence matters, placement matters, and no single product is a shortcut around doing the layers right. Get those fundamentals in order, and even a -35°C wind chill outside won’t mean a frozen coffee cup and a dead battery inside.
✨ Ready to stop dreading garage mornings this winter? Start with the door kit and air sealing this weekend — they’re the fastest, most affordable wins on this entire list, and they’ll make every colder day noticeably more bearable.
Recommended for You
- Insulation for Garage Walls: 7 Best Picks to Try in 2026
- 7 Best Propane Tank Top Heater Picks for Canadian Winters (2026)
- Space Heater for Workshop: 7 Picks That Actually Work (2026)
Disclaimer: This article contains affiliate links. As an Amazon Associate, I earn from qualifying purchases. If you purchase products through these links, we may earn a small commission at no additional cost to you.
✨ Found this helpful? Share it with your friends! 💬🤗
