
In This Article
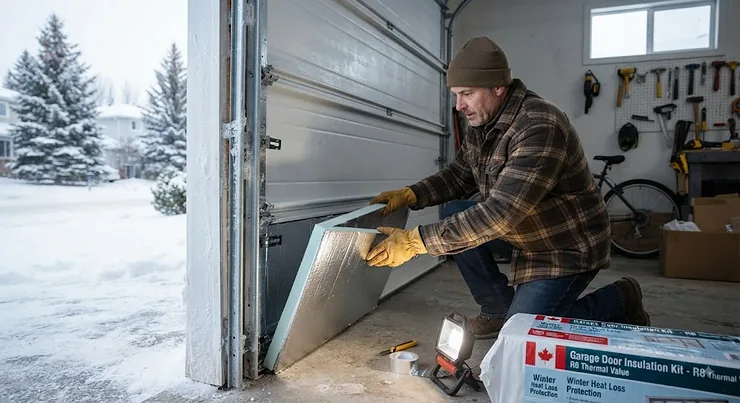
A garage door insulation kit is a pre-cut set of foam, fiberglass, or reflective panels installed inside the frame of an uninsulated garage door to slow heat transfer, typically raising an R-0.3 steel door to somewhere between R-4 and R-9…and that single change can be the difference between a garage that hovers near the outdoor temperature and one you can actually stand to work in come January. If you’ve ever pressed a palm against your garage door on a minus-20 morning and felt it radiating cold like a slab of ice, you already understand the problem this article solves.
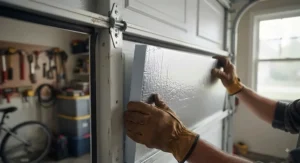
Here’s the thing nobody tells you before you start shopping: not every garage door insulation kit is built the same, and the difference between an R-4 reflective roll and an R-8 fiberglass panel set isn’t just a number on a box — it’s the difference between “noticeably less drafty” and “I can leave my paint cans in here without them freezing.” We dug through real product specs, manufacturer documentation, and aggregated buyer feedback across seven genuinely available kits, from budget reflective foil to premium high-density foam, so you’re not gambling C$150 on a guess.
This guide is built for Canadian garages specifically — which means we’re accounting for real winters, not the mild “cold snap” that other regions call a cold front. Whether you’re chasing the best garage door insulation kit reviews have to offer, comparing diy garage door insulation panels against a full retrofit kit, or just trying to figure out whether reflective foil insulation garage door products actually hold up against fiberglass, you’ll find the honest breakdown below. According to Natural Resources Canada, home energy efficiency improvements — including addressing weak points like an uninsulated garage door — remain one of the most cost-effective ways Canadian homeowners can cut heating and cooling losses.
Quick Comparison Table
Before the deep dive, here’s the short version. If you already know roughly what you need — budget, coverage for a double door, or a fast weekend install — this table gets you there in under a minute.
| Category | Kit | R-Value | Price Range (CAD) | Best For |
|---|---|---|---|---|
| Best Overall | Owens Corning Garage Door Insulation Kit | R-8 | C$110–C$140 | Single-car doors wanting proven fiberglass performance |
| Best Budget | US Energy Products Double Bubble Reflective Foil Kit | R-4 | C$55–C$80 | Renters and tight budgets |
| Best for Double Doors | NASA TECH Reflective Foam Core 2-Car Kit | R-8 | C$150–C$190 | Two-car garages needing one complete kit |
| Fastest Install | Matador SGDIK001 Insulation Kit | R-4.8 | C$90–C$120 | Tool-free, no-adhesive installers |
| Best Weatherstripping Add-On | BOWSEN Heavy-Duty U+O Ring Weatherstrip Kit | N/A (draft seal) | C$45–C$75 | Sealing the gap panels can’t fix |
A quick read on the numbers: the “best overall” pick isn’t automatically the “best value” pick, and that trips people up constantly. The Owens Corning Garage Door Insulation Kit earns its spot on raw R-value and brand reliability, but if your garage is more about keeping out drafts than hitting a specific thermal target, the US Energy Products Double Bubble Reflective Foil Kit does 70% of the job for half the money. And if you’ve been treating panels and weatherstripping as an either/or choice, that’s the biggest mistake in this whole category — they solve different problems, which we’ll unpack later.
💬 Just one click — help others make better buying decisions too!😊
Top 7 Garage Door Insulation Kits: Expert Analysis
We prioritized kits with verifiable specs, real coverage claims, and enough of a market presence that aggregated review sentiment actually exists to draw from. Coverage spans budget, mid-range, and premium tiers, plus single-car, double-car, and weatherstripping-specific options.
1. Owens Corning Garage Door Insulation Kit — best all-around fiberglass performance
The standout here is simple: R-8 is the highest widely-available rating in the fiberglass panel category, and Owens Corning backs it with a recognizable name most Canadian buyers already trust from attic and wall insulation. The kit ships with eight panels sized 22 in. x 54 in. (roughly 56 cm x 137 cm), enough to cover a single steel door up to 9 feet wide by 7 feet 8 inches tall, and the vinyl facing is washable rather than the paper-faced fiberglass you’d find in wall batts. Owens Corning states the kit cuts noise transmission by up to 20%, which matters more than people expect if your garage shares a wall with a bedroom or home office.
Based on the spec comparison, this kit is the right call for anyone insulating a single attached garage where the goal is genuine thermal performance, not just draft reduction — the R-8 rating roughly matches what a factory-insulated steel door offers. Reviewers consistently report that the retainer-clip fastening system holds up better over multiple seasons than tape-only competitors, though a few note the fiberglass edges need careful handling with gloves during the cut-and-fit process.
Pros:
- ✅ Highest common R-value among panel-style DIY kits
- ✅ Washable vinyl facing resists dust and stains
- ✅ Retainer-clip system outlasts tape-based installs
Cons:
- ❌ Covers only a single-car door per kit
- ❌ Fiberglass dust requires gloves and eye protection
Expect to pay around C$110–C$140 at the time of research; given the R-8 rating and brand reliability, it’s a strong value for anyone treating this as a long-term upgrade rather than a stopgap.
2. Matador SGDIK001 Insulation Kit — fastest tool-free install
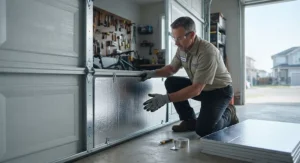
What immediately sets this kit apart is the installation method: no tape, no adhesive, no fasteners. The eight EPS foam panels — sized about 20.25 in. x 54 in. and roughly 1.25 in. thick — press directly into the horizontal and vertical rails of a standard steel door, the same way factory-insulated doors are built, because Matador manufactures OEM-grade material for actual garage door companies. At R-4.8, it lands in the middle of the pack thermally, but the panels are scored for easy bending into place, and the high-impact polystyrene laminate wipes clean without staining.
This is the kit for buyers who dread the “adhesive residue and crooked cuts” experience of other DIY panels. Because it press-fits rather than sticks, there’s no cure time and no risk of tape failing in humidity — a real consideration in an unheated Canadian garage where condensation is common in shoulder seasons. What most buyers overlook is that this same tool-free system is what actual garage door manufacturers use on factory-insulated doors, so the finished look is genuinely closer to a “real” insulated door than most retrofit kits achieve. Aggregated reviewer sentiment points to an install time consistently under an hour, with a limited lifetime warranty backing the panels.
Pros:
- ✅ Zero tape, glue, or fasteners required
- ✅ OEM-grade panels match factory door construction
- ✅ Limited lifetime warranty included
Cons:
- ❌ R-4.8 trails fiberglass and high-density foam options
- ❌ No adhesive means panels can loosen on worn tracks
Pricing typically sits around C$90–C$120 at the time of research, which is reasonable for the installation convenience, even if the R-value isn’t chart-topping.
3. NASA TECH Reflective Foam Core 2-Car Kit — best for double-wide doors
The standout feature is coverage: this is a complete kit sized for 16 to 18-foot double garage doors, arriving as four rolls of 2 ft x 18 ft reflective foam-core insulation rather than forcing you to buy and match two single-door kits. The closed-cell foam core sits between two layers of reflective foil, rated at R-8 by the manufacturer, and functions simultaneously as a radiant barrier and a basic vapour barrier — a combination the plain fiberglass panels above don’t offer.
Here’s what the spec sheet won’t tell you outright, but the included accessories make clear: this is designed as a genuine one-box solution, bundling a utility knife, squeegee, and heavy-duty double-sided tape so you’re not scrambling for extra tools mid-install. That’s a meaningful advantage for double-car garages, where mismatched single-door kits often leave awkward gaps at the centre seam. Reviewers consistently note that the reflective surface makes a visible difference on hot, sun-exposed doors in summer, while the closed-cell foam still delivers respectable winter performance; a recurring complaint in user reviews is that the double-sided tape needs a genuinely clean, dust-free surface to bond properly, so skipping the wipe-down step causes early peeling.
Pros:
- ✅ Purpose-built for 16–18 ft double garage doors
- ✅ Combines R-8 insulation with a radiant heat barrier
- ✅ Includes knife, squeegee, and tape in one box
Cons:
- ❌ Tape-based install is fussier than press-fit systems
- ❌ Premium pricing for the full double-door size
Expect a price range of roughly C$150–C$190 CAD for the 2-car kit at the time of research — a fair ask considering it replaces two separate single-door purchases.
4. US Energy Products Double Bubble Reflective Foil Kit — best budget reflective barrier
The advantage here is pure accessibility: this is the lowest-cost genuine insulation option in this roundup, built from two layers of polyethylene air bubbles sandwiched between reflective aluminum-polyester film. The manufacturer rates it around R-4 and claims roughly 97% reflection of radiant heat, and because it ships as a roll rather than pre-cut panels, one roll can be trimmed to fit a wide range of door sizes with a utility knife or scissors.
On paper this means less raw thermal resistance than the foam or fiberglass kits above, and that trade-off is real — R-4 is meaningfully lower than R-8. But reflective foil’s strength isn’t R-value alone; it’s radiant heat rejection, which matters disproportionately in garages that get direct summer sun on a south- or west-facing door. Based on the spec comparison, this product earns its “budget” label honestly: it’s not pretending to match a fiberglass kit’s winter performance, but it’s a legitimate entry point for anyone testing whether garage insulation is worth the investment before committing to a pricier kit. Reviewers frequently mention needing more patience during install since the material isn’t pre-cut to door-panel dimensions.
Pros:
- ✅ Lowest price point of any kit in this roundup
- ✅ Lightweight roll trims to fit almost any door
- ✅ Doubles as insulation for attics, RVs, or sheds
Cons:
- ❌ R-4 rating trails foam and fiberglass alternatives
- ❌ Not pre-cut, so expect more measuring and cutting
Pricing generally falls around C$55–C$80 at the time of research, making this the kit to start with if you’re insulation-curious but not ready to commit to a premium purchase.
5. BEEST FULLSTOP Garage Door Insulation Kit — best all-in-one kit with extras
The standout feature is what’s bundled in: alongside pre-cut 24 in. x 48 in. foam-core panels (eight for single doors, sixteen for double), this kit throws in bonus door seals and window film — extras that typically require separate purchases with competing kits. The foam-core panels arrive genuinely pre-cut to standard door dimensions rather than requiring on-site trimming from a roll, which shortens install time noticeably compared with roll-style reflective products.
What most buyers overlook when comparing kits side by side is that insulation panels alone don’t address the perimeter gaps where a huge share of garage heat loss actually happens — this is the rare panel kit that ships with a partial answer to that built in. The included cutter and squeegee round out a genuinely complete toolkit, so there’s minimal need to raid your own garage for supplies before starting. Aggregated buyer sentiment is positive on the value of the bundle, though a recurring theme in reviews is that the bundled seals and window film are a nice-to-have rather than a heavy-duty replacement for a dedicated weatherstripping kit like the one further down this list.
Pros:
- ✅ Pre-cut panels for both single and double doors
- ✅ Bundled seals and window film add extra value
- ✅ Complete toolkit included — cutter, tape, squeegee
Cons:
- ❌ R-value sits below premium fiberglass options
- ❌ Bundled extras are lighter-duty than standalone products
Price ranges run about C$75–C$110 for single-door kits and C$130–C$170 for double-door versions at the time of research — solid value once you account for what’s normally sold separately.
6. BOWSEN Heavy-Duty U+O Ring Weatherstrip Kit — best dedicated weatherstripping upgrade
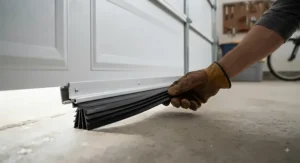
This one stands apart from the rest of the list because it’s not a panel kit at all — it’s a 16-foot bottom-seal weatherstripping kit with a U+O ring rubber profile and an aluminum track retainer, designed to close the gap between the bottom of the door and an uneven garage floor. The dual-profile rubber (a U-shape combined with an O-ring bead) is built to flex against concrete that isn’t perfectly level, which is common in older Canadian driveways and slab garages that have settled over the years.
Here’s the analytical case for including a dedicated seal kit in this roundup: panel insulation raises the R-value of the door itself, but it does nothing for the air gap underneath it, and that gap is frequently the single largest source of draft in an attached garage. Reviewers consistently point to the aluminum track as the differentiator versus cheaper adhesive-only strips, since it mechanically locks the rubber in place instead of relying on glue that can fail in freeze-thaw cycles. A common complaint in user reviews is that installing the aluminum track requires drilling and a bit more patience than a peel-and-stick strip, but that same track is why the seal lasts multiple seasons instead of one.
Pros:
- ✅ Dual U+O profile seals uneven concrete floors
- ✅ Aluminum track resists freeze-thaw adhesive failure
- ✅ Addresses drafts panel kits can’t fix
Cons:
- ❌ Adds zero R-value to the door panel itself
- ❌ Track installation needs drilling, not just peel-and-stick
Expect to pay roughly C$45–C$75 at the time of research — arguably the best return-on-investment item on this entire list when paired with any panel kit above.
7. High-Density R-9 EPS Foam Panel Kit — best for extreme cold climates
The standout advantage is raw thermal resistance: at R-9, this laminated high-density EPS foam kit edges out every other panel product in this roundup, including the R-8 fiberglass and reflective options. It follows the same eight-panel, press-fit format as the Matador kit — sized around 1.25 in. x 20 in. x 54 in. — but uses a denser foam core with a laminated facing designed to hold its shape and R-value better over time than lower-density alternatives.
Based on the spec comparison, this is the kit worth the modest premium for anyone in a genuinely cold pocket of the country — the Prairies, northern Ontario, or anywhere winter design temperatures regularly sit below -25°C. The higher density also means less compression over years of door cycling, which is a real weakness in cheaper low-density foam panels that can crush and lose thickness (and R-value) after a couple of seasons. Reviewers note the laminated facing wipes down easily and resists the yellowing some budget foam panels develop with UV exposure near a window or skylight, though the thicker panel profile is worth double-checking against tighter door channel depths before ordering.
Pros:
- ✅ Highest R-value (R-9) of any panel kit here
- ✅ High-density foam resists compression over time
- ✅ Laminated face resists yellowing and staining
Cons:
- ❌ Less established brand history than Owens Corning or Matador
- ❌ Thicker panels may not fit every door channel
Price sits around C$100–C$140 at the time of research, a reasonable ask for the best raw R-value-per-panel figure in this comparison.
How to Install Your Garage Door Insulation Kit the Right Way
Installation quality determines whether you actually get the rated R-value or lose half of it to gaps and sloppy cuts — and this is where most garage door insulation kit installation guides gloss over the details that actually matter.
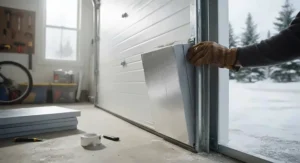
Start by measuring each door section individually rather than assuming they’re identical; steel doors shift slightly over years of operation, and a panel cut for the top section rarely fits the bottom one perfectly. Clean every panel surface with a damp cloth before you begin — dust and old grease are the single biggest reason double-sided tape and reflective foil kits fail early, something the Bob Vila testing team specifically flagged as a common installation misstep. Work from the bottom section upward so falling debris from cutting doesn’t land on panels you’ve already finished. For press-fit kits like the Matador and R-9 EPS options, insert one edge behind a horizontal rail first, then flex the panel gently to seat the opposite edge — forcing it straight in tends to crack the foam.
Maintenance is minimal but not zero. Wipe panels down twice a year with a damp cloth, check tape-adhered kits each fall for peeling corners before winter arrives, and inspect any weatherstripping for compression or cracking annually — rubber seals typically need replacing every 3 to 5 years in climates with major freeze-thaw swings. The most common first-30-days mistake we see reported is skipping a test-run of the door before final panel trimming, which risks a panel catching on the opener’s travel path and tearing loose.
✨ Ready to Insulate Your Garage the Right Way!
🔍 Compare current pricing on the kits above before you commit to a size — availability and stock shift often, and locking in the right coverage for your door width matters more than saving a few dollars on the wrong-sized kit.
Real-World Scenarios: Which Kit Fits Your Garage
Specs only tell half the story — matching a kit to your actual situation is where the decision gets made.
The weekend workshop owner. If you’ve converted part of a single-car attached garage into a workbench space you use year-round, the Owens Corning Garage Door Insulation Kit is the logical pick. Its R-8 rating and noise-dampening vinyl facing suit a space where you’re spending hours at a time, not just parking and leaving.
The double-garage family in a cold-climate suburb. For a two-car attached garage in a region with harsh winters — think Winnipeg, Edmonton, or rural Ontario — the NASA TECH Reflective Foam Core 2-Car Kit solves the sizing headache of matching two single kits, and its radiant-plus-thermal combination handles both winter cold and summer sun exposure on a west-facing door.
The budget-conscious renter or first-time DIYer. If you’re testing whether insulation is worth pursuing further, or you’re in a rental where a big investment doesn’t make sense, start with the US Energy Products Double Bubble Reflective Foil Kit paired with the BOWSEN Heavy-Duty U+O Ring Weatherstrip Kit. Together they cost less than most single premium panel kits alone, and the seal kit alone often delivers a noticeable draft reduction within a weekend.
How to Choose the Best Garage Door Insulation Kit
Use this sequence to narrow your decision quickly:
- Measure your door precisely — width, height, and panel count (usually 4 horizontal sections) determine which kit size you actually need.
- Identify your climate priority — colder regions benefit more from higher R-value foam or fiberglass; hot, sun-exposed doors benefit more from reflective foil.
- Decide on installation style — press-fit kits (Matador, R-9 EPS) suit installers who dislike adhesives; tape-based kits (NASA TECH, reflective foil) suit tighter budgets.
- Check door material compatibility — most kits are designed for steel doors with exposed horizontal and vertical rails; wood or insulated doors may not need or fit a retrofit kit at all.
- Budget for weatherstripping separately — a panel kit insulates the door surface, not the perimeter gap, so factor in a seal kit like the BOWSEN option for full draft control.
- Verify current pricing before buying — prices shift with demand, especially before cold snaps, so check listings at the time of purchase rather than relying on older reviews.
- Match coverage to door count — single-car kits rarely stretch to cover a double door; buy a dedicated 2-car kit or two matching single kits rather than mixing brands.
DIY Garage Door Insulation Panels vs Reflective Foil Insulation: Which Wins?
This is one of the most common points of confusion in the category, and the honest answer is: it depends on what problem you’re solving. Rigid diy garage door insulation panels — fiberglass, EPS foam, or high-density foam — resist heat transfer through the material itself, which is measured directly as R-value. Reflective foil insulation garage door products work differently: they reflect radiant heat rather than resisting conductive heat flow, which is why their R-value ratings (typically R-4 to R-6) look lower on paper but can still perform well against direct solar heat gain.
In practice, this means foam and fiberglass panels generally win for winter performance in a cold Canadian climate, where the dominant heat-loss mechanism is conduction through a cold steel door. Reflective foil tends to win for garages that face intense summer sun, where radiant heat gain — not winter conduction — is the bigger comfort problem. Reviewers who’ve used both note that fiberglass and foam panels feel more “finished,” while foil kits are lighter and easier to trim around obstructions like window cutouts in the door panel.
| Factor | Rigid Panels (Foam/Fiberglass) | Reflective Foil |
|---|---|---|
| Typical R-value | R-4.8 to R-9 | R-4 to R-6 |
| Best climate use | Cold winters, conductive heat loss | Hot summers, radiant heat gain |
| Install method | Press-fit or light adhesive | Tape or staples, more cutting |
| Weight | Heavier, more rigid | Lightweight, flexible |
Looking at the comparison above, cold-climate buyers should lean toward panel kits like the Owens Corning Garage Door Insulation Kit or the High-Density R-9 EPS Foam Panel Kit, while buyers dealing primarily with a hot, sun-baked door should weigh the US Energy Products Double Bubble Reflective Foil Kit or the reflective side of the NASA TECH Reflective Foam Core 2-Car Kit more heavily.
💬 Not sure which type fits your garage? Compare current listings side-by-side before you buy — it’s the easiest way to confirm sizing and avoid a return.
Insulated Garage Door vs Retrofit Kit
Here’s a question worth answering honestly before you spend a dollar: should you insulate the door you have, or replace it with a factory pre-insulated one? The insulated garage door vs retrofit kit decision usually comes down to the age and condition of your existing door.
A retrofit kit — any of the seven products above — adds R-4 to R-9 to an existing steel door for well under C$200 in most cases. A full factory-insulated replacement door, by contrast, typically ships with polyurethane foam injected between two steel skins, reaching R-12 to R-18 or higher, but the installed cost runs dramatically higher and involves professional installation, not a weekend project.
| Consideration | Retrofit Kit | Insulated Replacement Door |
|---|---|---|
| Typical R-value achieved | R-4 to R-9 | R-12 to R-18+ |
| Installation | DIY, 1–2 hours | Professional install required |
| Approximate cost | C$45–C$190 | Significantly higher, varies by size and material |
| Best for | Doors under 10 years old in good condition | Doors that are damaged, dented, or near end-of-life |
Looking at the numbers here, a retrofit kit makes overwhelming financial sense for a structurally sound door that’s simply uninsulated — you’re capturing most of the comfort benefit for a fraction of the cost. Replacement only pulls ahead when the existing door is already damaged, poorly balanced, or old enough that you’d be replacing hardware and springs soon anyway. Renovation resources like Reno Quotes’ garage insulation guide echo this same logic: garage door material and condition should guide whether you insulate what you have or start fresh.
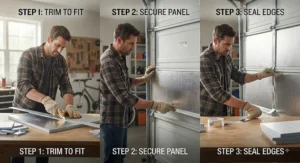
Garage Door Weatherstripping: The Overlooked Half of the Job
If you only take one thing from this article, let it be this: garage door weatherstripping is not optional if you’re serious about eliminating drafts, and most people buy a panel kit and completely skip it.
The perimeter gap around a garage door — especially along the bottom, where concrete floors are rarely perfectly level — is frequently responsible for more measurable air infiltration than the door panel itself. That’s not a knock on panel kits; it’s simply a different problem. A rigid foam or fiberglass panel resists heat conduction through the door surface, but it does nothing to stop cold air from streaming in underneath or around the sides. This is exactly the gap the BOWSEN Heavy-Duty U+O Ring Weatherstrip Kit is built to close, using an aluminum track to mechanically hold the rubber seal against an uneven floor rather than relying on adhesive alone.
What most buyers overlook is that pairing a mid-tier panel kit with quality weatherstripping frequently outperforms an expensive premium panel kit installed with old, cracked seals still in place. If you’re only budgeting for one upgrade this season, a seal kit under C$75 paired with basic reflective panels may deliver a better draft-reduction result per dollar than a top-tier fiberglass kit alone.
Features That Actually Matter (And Those That Don’t)
Marketing copy on insulation kits loves to lean on numbers that sound impressive but don’t move the needle much for a typical Canadian garage.
What actually matters: R-value appropriate to your climate zone, a fastening system that survives temperature swings (press-fit or clip-based generally outlasts adhesive-only), and perimeter sealing via weatherstripping. Panel thickness also matters more than people expect — thicker panels generally mean higher R-value, but only if they still fit your door’s channel depth.
What matters less than the marketing suggests: exact percentage claims like “reflects 97% of radiant heat” sound precise, but that figure describes the material in isolation under lab conditions, not your actual installed performance with seams, cuts, and imperfect surface contact. Similarly, “reduces garage temperature by 30 degrees” style claims are directional, not a guarantee — actual results depend heavily on your door’s exposure, garage size, and whether you’ve also addressed weatherstripping. Colour and finish (white vinyl vs foil) are mostly cosmetic; they don’t meaningfully change thermal performance beyond the panel’s core material and R-value rating.
Common Mistakes When Buying a Garage Door Insulation Kit
The same handful of errors show up again and again in buyer feedback across every kit in this roundup.
Buying a single-door kit for a double door is the most frequent mistake — measure your actual door width before ordering, not just the garage’s general size. A close second is skipping weatherstripping entirely and expecting a panel kit alone to eliminate drafts; as covered above, these solve different problems. Installing over a dirty or greasy door surface causes early tape and adhesive failure, particularly with reflective foil products. Buyers also commonly underestimate cut precision — panels that are even half an inch short leave a gap that undermines the whole kit’s performance. Finally, ignoring your door’s channel depth before ordering thicker high-R panels can mean panels that simply won’t seat properly once you’ve already opened the box.
Garage Door Insulation Kits for Cold Canadian Winters vs Hot Summers
Canada’s climate range — from coastal mild winters to Prairie deep freezes to humid Ontario summers — means the “best” kit genuinely shifts by region. In cold-dominant climates (the Prairies, northern Ontario, Quebec’s interior), prioritize raw R-value: the High-Density R-9 EPS Foam Panel Kit or Owens Corning Garage Door Insulation Kit deliver the most resistance to conductive heat loss through a door that might see -30°C wind chills.
In milder coastal climates like much of B.C.’s Lower Mainland, or in regions where summer heat gain through a sun-facing door is the bigger annoyance, reflective options like the US Energy Products Double Bubble Reflective Foil Kit punch above their R-value rating by rejecting radiant heat rather than just slowing conduction. For provinces with genuinely mixed extremes — much of Ontario and the Maritimes — the combination approach in the NASA TECH Reflective Foam Core 2-Car Kit, which layers reflective foil over a foam core, tends to perform the most consistently across both seasons.
Long-Term Cost & Maintenance
A garage door insulation kit is inexpensive relative to its potential payback, but the real value proposition depends on your heating costs, garage usage, and how long the kit lasts before needing replacement.
| Kit Type | Approx. Price (CAD) | Typical Lifespan | Value Notes |
|---|---|---|---|
| Reflective foil (budget) | C$55–C$80 | 3–5 years | Lowest upfront cost, may need earlier replacement |
| Foam panel (Matador, R-9 EPS) | C$90–C$140 | 5–10 years | Strong balance of cost and durability |
| Fiberglass (Owens Corning) | C$110–C$140 | 8–12+ years | Longest-lasting per dollar spent |
| 2-car reflective/foam combo | C$150–C$190 | 5–8 years | Best for covering large doors in one purchase |
| Weatherstripping (BOWSEN) | C$45–C$75 | 3–5 years | Cheapest upgrade, high impact on draft reduction |
Looking at this table, fiberglass panels come out ahead on cost-per-year specifically because they tend to hold their shape and R-value longer than lower-density foam, which can compress with repeated door cycling. That said, weatherstripping delivers the fastest payback of anything on this list simply because it’s the cheapest fix for the single largest source of drafts. Save on Energy’s insulation buying guide notes that any insulation upgrade, even a modest one, contributes positively to overall home energy efficiency — so there’s no wrong place to start, only a more or less optimal order of operations.
Maintenance costs are minimal across every kit here: expect to replace weatherstripping every few years and to re-tape or re-clip loosened panel corners occasionally, but none of these products require ongoing spend beyond the initial purchase.
Safety, Building Codes & Regulations in Canada
Before installing any garage door insulation kit, it’s worth understanding where Canadian building codes touch this project. Provincial energy codes increasingly treat attached garages as part of a home’s thermal envelope rather than an afterthought — Alberta’s energy code guidance, for example, specifically requires attached garages to be insulated even when unheated, while detached garages face insulation requirements only if they’re heated.
For a DIY retrofit kit, there’s generally no permit required since you’re modifying an existing door’s interior surface rather than replacing structural components — but if you’re pursuing a full door replacement instead, check your municipality’s requirements, since some regions require permits for garage door replacement tied to structural or fire-separation rules between an attached garage and living space. Materials matter for fire safety too: reputable kits, including several in this roundup, are manufactured to meet U.S. and international fire codes, which is worth confirming on the product listing before you buy. If your garage sits beneath or beside living space, CSA-certified building materials and proper vapour barrier practices become more important, since improperly sealed insulation can trap moisture against a cold steel door and encourage condensation or rust over time.
FAQ
❓ What R-value do I need for a garage door insulation kit in Canada?
❓ Can I install a garage door insulation kit myself?
❓ Does garage door insulation actually lower heating bills?
❓ Is reflective foil insulation as effective as foam panels?
❓ How long does a garage door insulation kit last?
Conclusion
If there’s one takeaway from comparing seven real kits side by side, it’s that the “best” garage door insulation kit genuinely depends on your door size, your climate, and whether you’re solving for winter cold, summer heat, or plain old drafts. The Owens Corning Garage Door Insulation Kit remains the strongest all-around choice for single-car doors chasing real R-8 performance, the NASA TECH Reflective Foam Core 2-Car Kit solves the double-door coverage problem in one purchase, and the US Energy Products Double Bubble Reflective Foil Kit proves you don’t need a big budget to start seeing results.
Don’t underestimate the pairing strategy, either — combining any panel kit with the BOWSEN Heavy-Duty U+O Ring Weatherstrip Kit consistently outperforms a premium panel kit installed alone with old, failing seals. Whichever direction you go, verify current pricing and exact door measurements before ordering, since even a well-reviewed kit is the wrong purchase if it’s sized for a door that isn’t yours.
✨ Found the Right Kit for Your Garage?
🔍 Check current pricing and availability on your top pick before the next cold snap — stock on popular sizes tends to tighten up fast once temperatures drop.
Recommended for You
- Portable Garage Heater: 7 Real Options Worth Buying in 2026
- 7 Best Garage Insulation Picks for -30°C Winters (2026 Guide)
- Insulation for Garage Walls: 7 Best Picks to Try in 2026
Disclaimer: This article contains affiliate links. As an Amazon Associate, I earn from qualifying purchases. If you purchase products through these links, we may earn a small commission at no additional cost to you.
✨ Found this helpful? Share it with your friends! 💬🤗
